


"For man, autumn is a time of harvest, of gathering together.
For nature, it is a time of sowing, of scattering abroad."
Edwin Way Teale

FABRIC PUMPKIN TUTORIAL

PETITE PUMPKIN and PUMPKIN PLACE CARD HOLDER

Materials you will need:
• Fabric for pumpkin
• Lace for leaves
• Thread –sewing thread to match fabric and upholstery thread
• Upholstery needle (6 in. needle)
• Stuffing (polyester)
• Twig for stem
• Craft glue and a Scissor

Print and save patterns for all three tutorials:


Instructions:
1. Print out pumpkin pattern. Trace pumpkin pattern onto fabric and cut out 5 petite pumpkin pieces (for 3 in. diameter and 1 ½ in. tall) from fabric for mini pumpkin place card holder or 6 pieces for a slightly larger petite pumpkin (4 in. diameter and 1 ½ in. tall).

2. Beginning and ending ¼ in. from each end sew two pumpkin pieces together along 1 edge. Be sure to pin right sides together matching raw edges and use a ¼ in seam allowance throughout.

3. Beginning and ending ¼ in. from each end sew a third pumpkin piece to remaining raw edge of second pumpkin piece. Repeat to attach remaining pumpkin pieces leaving and opening for turning in the center of the last seam.


4. Clip seams on curved areas to ease fabric being careful not to clip your stitching. Turn pumpkin right side out. Stuff pumpkin with polyester stuffing and neatly hand stitch stuffing opening closed.


5. Thread upholstery needle with a double length of upholstery thread and make a triple knot in the end. Draw the needle up through the center bottom of the pumpkin exiting through the top center of the pumpkin. Line the upholstery thread on the seam and gently tug thread to pouf pumpkin. Repeat process over all seams plumping the pumpkin into shape. Tie off a knot, clip thread, and add a dot of glue to secure.


6. Apply glue to center top dimple of pumpkin and place in twig. Allow glue to set before embellishing your pumpkin.
7. Use a snippet of lace to create a “leaf” for your pumpkin then embellish as you so desire.
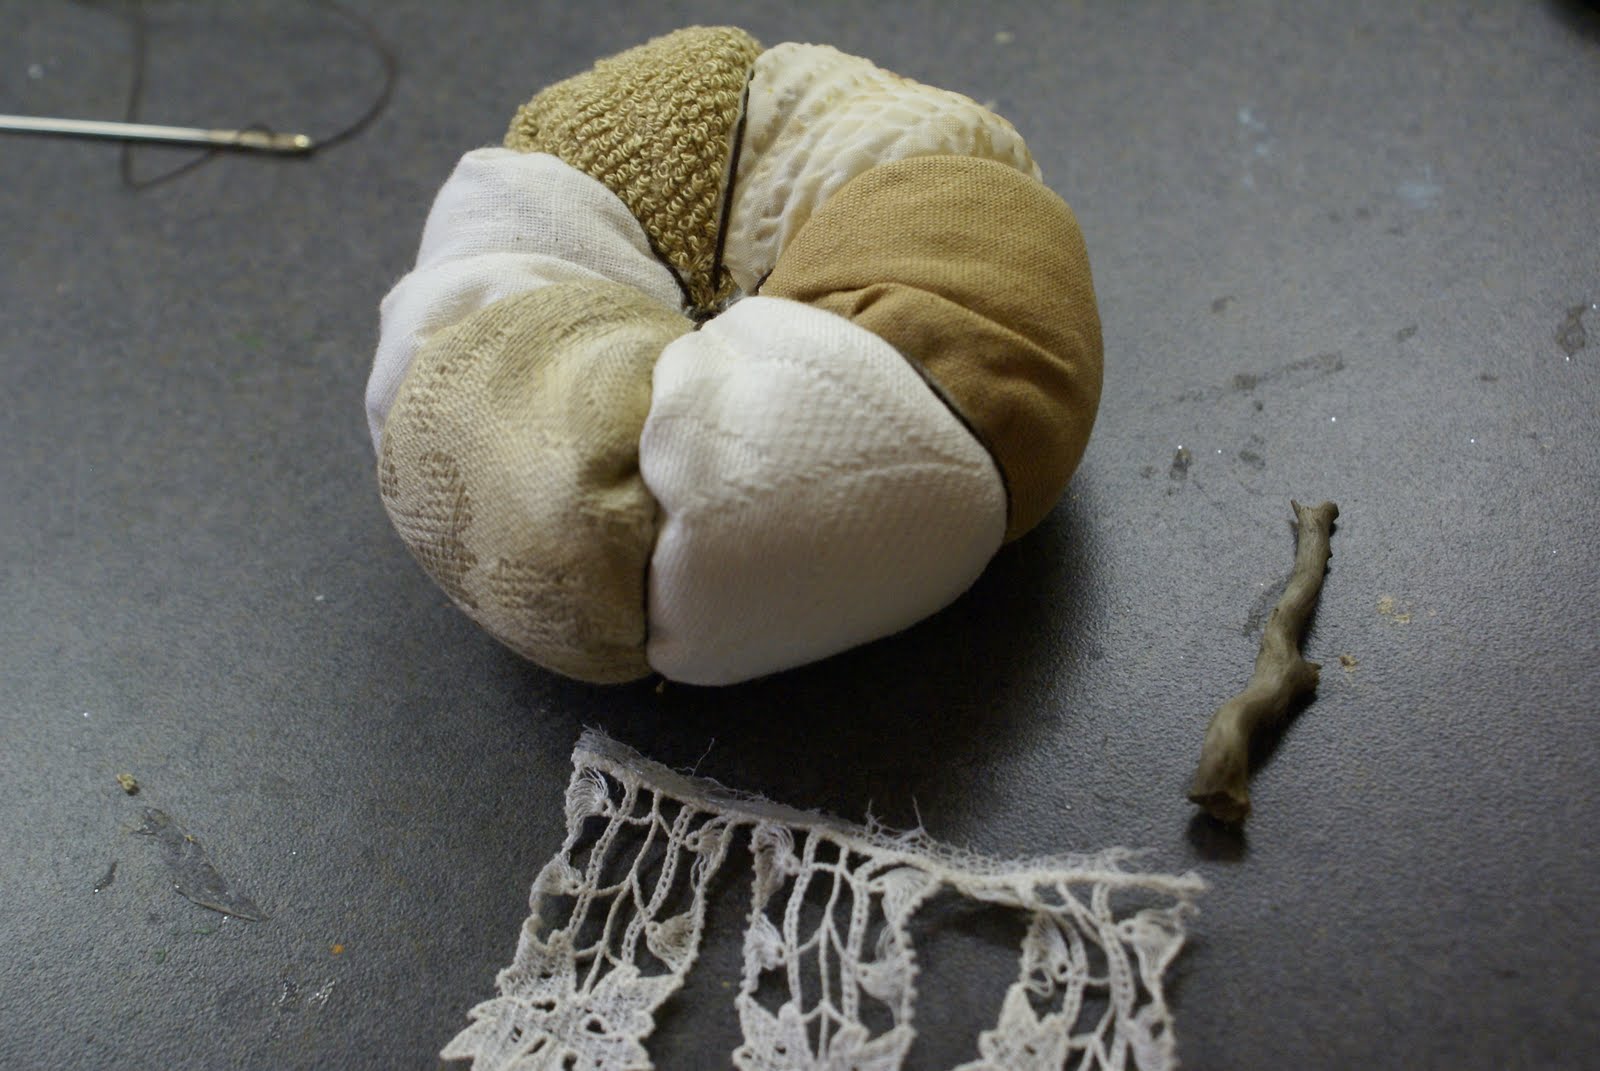

*To give your pumpkin a frost kissed look, lightly dab matte gel medium at random across the lace leaf and pumpkin top, dust with Martha Stewart Crystal Fine Glitter.

 *To use small five panel pumpkin for a place card holder, twirl a piece of 20 gauge copper wire into a loose swirling circle leaving about a 1 ½ inch straight piece. Glue straight piece to stem then further secure with a ribbon tie.

NOTE: I have provided you with bonus patterns for a large (9 in. in diameter and 6 in. tall) and medium (6 in. in diameter and 3 in. tall) sized pumpkins. Use the same directions as above to create these larger versions.
FABRIC ACORNS

Materials you will need:
*Needle and Thread
*Polyester Stuffing
*Acorn Caps gathered from nature
*Hot Glue
*Scissor
*Yo-yo Maker - small size (optional)
I learned how to make these adorable acorns several years ago from Cindy of Cindy Is Crafty. These are fast easy and awesome accent for your holiday table. If you do not have a Yo-yo Maker I have provided a pattern for you to use but you may need to adjust the size of the circle to fit your acorn caps.
Instructions:
1. If using Yo-yo Maker, simply follow manufacturer’s instructions for gathering the circle of fabric. If using the provided pattern, cut out circle of fabric.

2. Fold edge of fabric towards the inside of the circle like making a little hem, approx. ¼ inch and hand stitch a loose stitch all the way around the circle.


 Pull thread to gather the circle into a little pouch, fill with stuffing and draw opening closed, knot thread and clip away excess.

 Place a dab of hot glue into acorn cap and insert gathered end of fabric acorn.


SKELETON LEAVES

While on a recent walk I kept noticing the scattered leaves that had fallen and dried to a crisp brown color, many of which had little portions of the leaf matter gone and all that was left were these lacy little skeletons. Gathering up a few I brought them into the studio and dropped them into a specimen tray where I have been collecting nature finds. They inspired me to recreate them in a paper version.
Materials you will need:
*Paper of your choice
*Tulle
*Gold metallic tissue paper
*Water
*Paint brush
*Matte Gel Medium or Wall Paper Paste
*Brown Ink Pad
*Cosmetic Wedge
*Pencil
*Scissor
Instructions:
1. Print out oak leaf pattern onto card stock and cut it out.
2. With a pencil, trace as many leaf patterns as will fit on your choice of paper.
 3. Choose a place on each leaf where the “skeleton” will show through, with a dab of water on the paint brush, brush water on that spot letting it soak into the paper to soften it.

 4. Gently push your finger through the damp area to create a hole and tear away a small bit of paper being sure to stay within the outlines of the leaf. Repeat for each leaf varying the torn away area. Allow paper to dry.
 5. Cut small squares of tulle to fit over holes, leaving a little extra to adhere to the back of the paper.
6. Turn paper over to back side and brush glue around the edges of each hole, apply tulle in over the hole and brush additional glue over tulle edges, allow to dry.
 7. Still working on the back side of your paper tear pieces of gold metallic tissue paper and collage the entire back surface being sure metallic side is up and leaving the open tulle areas uncovered. To do this simply brush small sections with matte gel medium or wall paper paste, lay a piece of tissue on the glue and gently brush over it with additional glue. Note that the tissue paper will soften quickly, may wrinkle or tear easily, don’t worry over any tears simply place a small piece over the tear and keep going. In this case, wrinkles are welcome! Allow to dry. I call this poor mans gold leaf. This gives the back of your leaf a finished look, it sandwiches the tulle, and it stabilizes the base paper to give it some thickness for creasing.

 Once dry cut out leaf shapes.
8. Lay leaf flat on a piece of paper and dab cosmetic sponge in brown ink pad then dab ink around leaf edges and over tulle area and along the edges of the hole, allow ink to dry.


 9. Gently crease your leaf down the center, folding right sides together. Repeat for some of the leaf tips to give dimension to them.


 Arrange your pumpkins, scatter your skeleton leaves, drop a few acorns, set the table, put out a few place cards and have yourself an autumnal feast!
Blessings,
Miss Sandy


