HomeARTWordsStudioTutorialsClassesShop

Showing posts with label Fiber Art. Show all posts

Sunday, September 2, 2012

PART 3 SERIES COMPLETE: TIPS FOR TITLING YOUR ART WORK...

"By viewing nature,
Natures handmaid, art,
Makes mighty things,
From small beginnings grow..."
~Dryden - Annus Mirabilis~
(The above quote is used as text on this piece.)

 You might be wondering why you would need to title your artwork.  Many times you do see published works that are accredited to an artist but described as "untitled".  Titling your work makes it more memorable.  It leads the viewer to a suggestion of what you want the piece or pieces to say.  A title is a signifier, a thread, or an open door as a way for the viewer to approach the image and appreciate what the artist is trying to say. Titling your work is also important if you are presenting at a gallery, a show, in a publication, or when artwork is for sale.

For me, titles rarely ever come until the work is complete and I have had time to spend with the art looking at it and thinking about it.  It is kind of like writing a book, you always have a working title but often it changes once the book is brought to completion.
 (I used a contrast of hard and soft textures of metal and fiber to give this piece depth and dimension.)

Sources for titling your work are abundant from the actual materials you use to getting out a dictionary, thesaurus, a synonym finder, poetry phrases, lines of a quote, magazines, books, song titles or lyrics, anything that will connect to the image(s) of the body of work you are trying to title.  You want to seek out a title that supports your work, but that also challenges or engages the viewer.

Spend some time with your artwork once it is complete, look at it, study it, then ask yourself what you are trying to say or show through your piece.   Is there a hidden depth or meaning?  A message you wanted to covey?  Simplicity or beauty?   Is there a mood or feeling you you want it to express?
 (I like how this little egg sort of rolled right off the edge of the canvas.)

Find key words that tie your series together or express what your individual artwork is about and make a list of as many as you can think of.  Write down any ideas or impressions you get from viewing the finished work. Then, narrow the list down to a few descriptions that describe the focal point or message of your work.

Take a standpoint of a viewer of your work not as the creator.  Ask yourself what stands out the most or what draws you to the work the most.  Narrow your list even further by these descriptions.
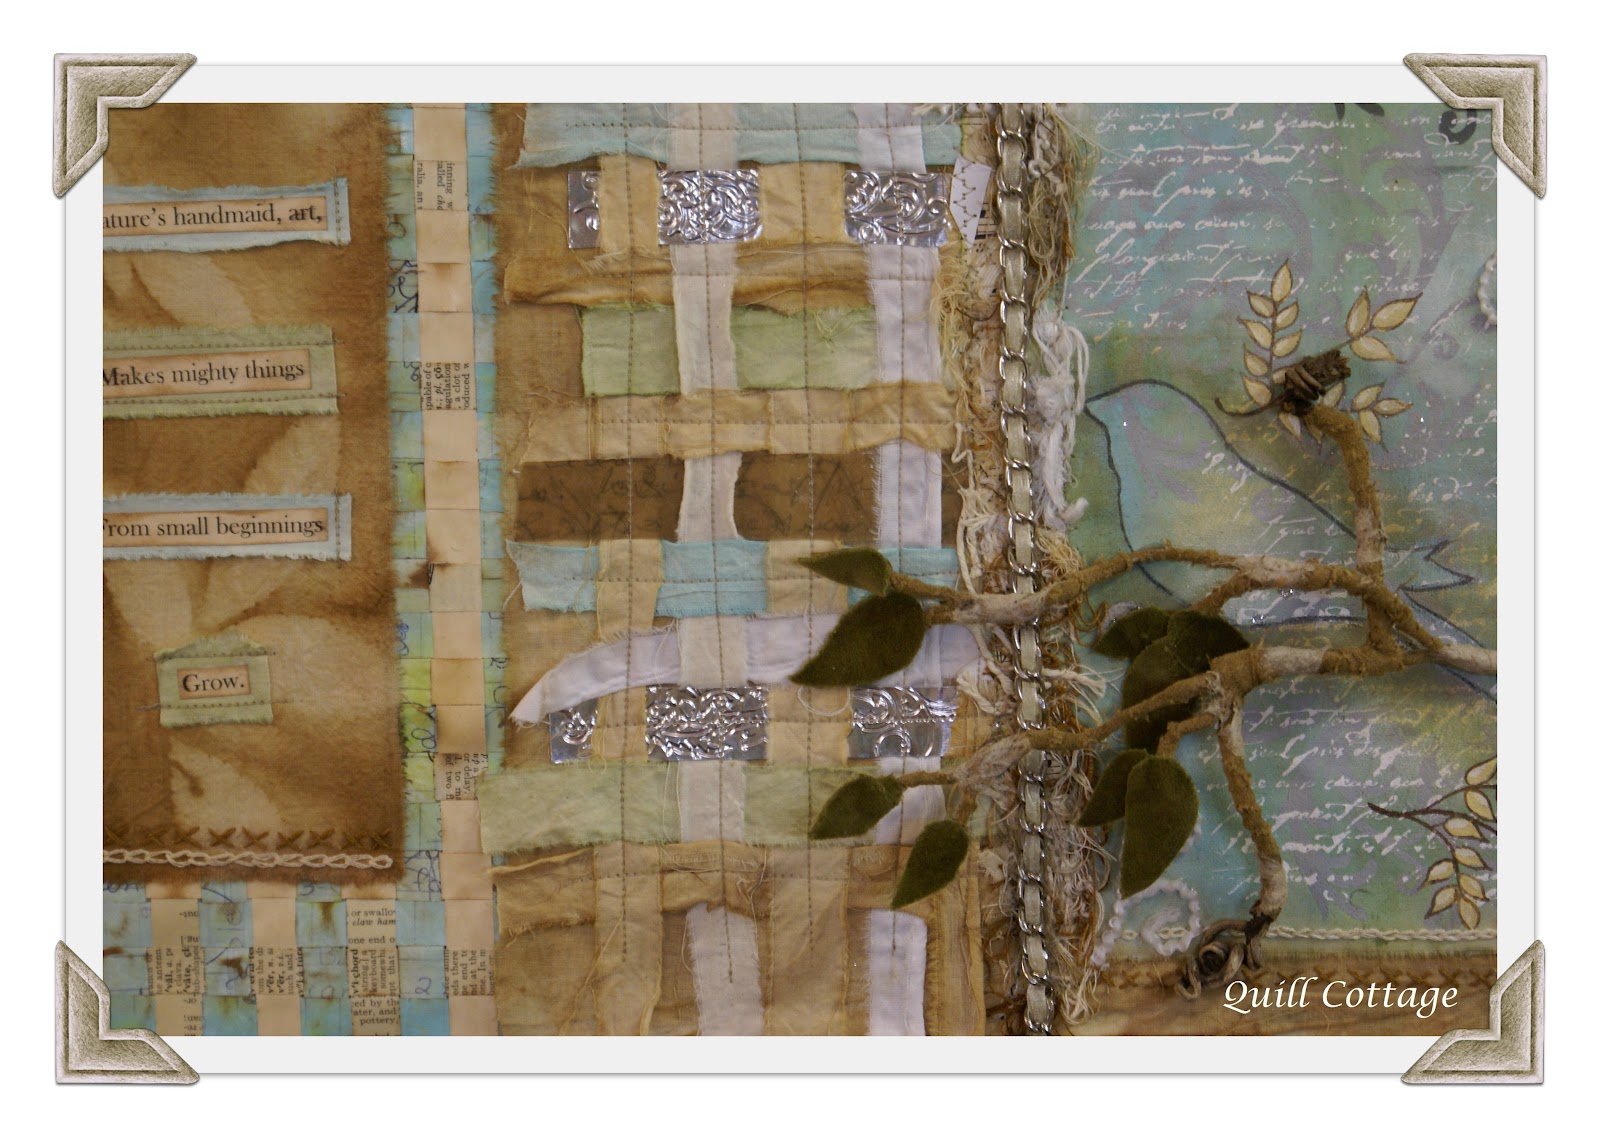
 (I used same texture on texture and same technique on technique to add interest to this piece.)

You have to figure out what you want your work to convey even before someone looks at it.  What feeling or response do you want it to invoke in the viewer?  Narrow your list to the best of the best descriptions of your work.

TIP:  Alliteration (the repetition of a beginning sound) helps when titling, you want a title that flows off the tongue and creates strong imagery or emotion.

From your list you will be able to create a title for your artwork that is descriptive, meaningful, and sounds great.
(I also used a variety of hand dyed fabrics to enhance the design.)

TIP:  Invite someone else to view your finished work and monitor their response or ask them to make a list of their observations.

TIP:  You want to stay away from negative titles, such as "Rage".  Most people do not want to purchase or hang a negative titled work in their home or office.  You may well have been trying to express rage in your work but more than likely it will be a hindrance to a selling point.  Although there are a few select collectors who might want a negative piece for their collection.

Not all work will lend itself to a title and that is perfectly fine too.  Often there are series or individual works that are simply numbered and signed and that is perfectly acceptable also.
 
 (Piece three of the series complete!)

TIP:  You also want to stay away from a title that is too obscure or vague or has a meaning only to you that your viewer or potential customer will not readily recognize or relate to.

Now, I need to go and spend some time with my artwork, taking my own advice to titling this series.
 (The complete series hanging out in the studio)

 Do you have any tips for titling artwork?
Do you want to help me in that process?
Then leave me some ideas in the comments,
 I 'd love to hear them!

PART 1: Thoughts on Working in a Series can be found HERE
PART 2:Artistic Goal setting can be found HERE


Friday, August 31, 2012

PART 2 SERIES COMPLETE: ARTISTIC GOAL SETTING...

"The Spice-Tree lives in the garden green,
Beside it the fountain flows,
And a fair bird sits in the boughs between,
And sings his melodious woes.

That out bound stem has branches three,
On each a thousand blossoms grow,
And old as aught of time can be,
The roots stand firm in the rock below."
~The Spice-Tree, John Sterling~
(The quote at the top of the post appears on this work.)
 The majority of the time my creative process is pretty willy-nilly.  I don't set time constraints or limits to when I need to get projects finished unless they are for a specific deadline, hence the drawer in my studio filled with half baked works in progress.  Through working on this series I learned a really valuable lesson in setting artistic goals, keeping sight of them, and eventually meeting them.

I confess that at one point I got completely lost, not in a good way, during the creation process and it was a total road block.  I could not see the next step or figure out where I was going.  I found myself forcing ideas that did not feel right.  I stepped away from the series and began a small side project that helped me to clear my mind.  I had an "aha moment" when I asked myself exactly what my beginning goal(s) was when I started this project.  Once I had firmly defined that it was like a breath of fresh air that revived my creative spirit and took the pressure off.
 (I used lots of layers of paint to create depth and texture to the flat fabric surface.)

 My goal was to try and see if I had the staying power to complete a 3 piece 16x20 canvas series of work based on the same subject matter, using the same color palette, exploring fabric, paper, and paint techniques that incorporate stitch and typography.  My goal was not to create something that would be the next big thing or trend.  Nor was it my goal to create something that was for publication, presentation, or profit, although that might be a future goal.  This was supposed to be a simple exercise in finding, defining, and refining my artistic style.

This is what I learned:  A clearly defined set of artistic goals can and will help you to move forward with your work.  They are also, at least for me, a liberation or freedom to create within a set of perimeters that take a lot of guess work or angst out of the process.  In the absence of a clearly defined goal you can get lost in the execution.
(Paper, paint, wire, beads, and resin create unique leaf elements.)

TIP:  Work SMART(er) not harder!  Chris Brogan simplified goal setting by using the acronym SMART:

Specific: Be specific and straightforward about what your goal is, why you are pursuing this goal and what you hope to accomplish, as well as how you are going to do it.

Measurable: Choose your goal with measurable progress in mind, setting small goals for process steps during each phase of your artwork, this will ultimately lead you to achieve the large end goal you have set.  Measuring your progress helps you to stay on track.
 
 (This piece also contains a kiss of metal to contrast the hard and soft of the materials.)

Attainable: Don't set your goal too far out of your reach or you will lose heart and not commit to follow through.  It's kind of like saying you are going to lose 20 pounds in 7 days before your high school class reunion, it is not obtainable or even possible.  A goal needs to stretch you slightly so you feel you can do it.

Realistic:  This means "do-able."  A realistic project may push your creative skills and knowledge but it should not break you.  You want to set the goal high enough that you have to obtain it with some effort but not so difficult that it sets the stage for failure.  You want a healthy balance of satisfied achievement.

Timley:  You need to set a time frame for your goal.  Putting this end point to your project will give you a clear target to work towards.  Sometimes when we don't have a time limit the project tends to not happen because we get in the mentality of needing to be inspired to work, or there is no sense of urgency to start or take action,  or you begin to feel as if you can do this at any time.  Case in point: my drawer of unfinished works in progress!
(This background was woven with the intention of a vertical stripe pattern.)

I am a very strong starter but a not so strong finisher, these guidelines really helped me in setting clear, reasonable, and obtainable artist goals.

Confession number two:  This was not always a fun or enjoyable process, hence the emphasis on the "work" part of artwork!  I was just about out of mind by the time I got the weaving done for the third canvas.  I really truly seriously wanted to quit.  This opportunity to stretch myself was, "...dressed in overalls and looked like work!" (Thomas Edison quote)   Trust me, there were some melodious woes being sung during this process. 
 (Various hand stitches were also use to enhance this design.)

I also confess that this style of working, in a series with set goals and perimeters, was extremely hard for me.  It truly was an exercise is self-discipline that stretched me just enough that my "won't give up, won't give in spirit" kicked in and helped me bring this project to completion.  The end result brought about an immense sense of satisfaction and accomplishment, the reward was worth the effort.  I now know I can discipline myself to setting, executing, and accomplishing my artist goals one step at a time.
(Part two of the series complete!)
I am off to set my sights on a new goal.

Do you have a goal setting process to getting your artful dreams accomplished?
Do you have an tips or secrets to share?
I'd love to hear them!

PART 1: Thoughts on Working in a Series can be found HERE

Wednesday, August 29, 2012

PART 1 SERIES COMPLETE: THOUGHTS ON WORKING IN A SERIES...

"The wind comes creeping, it calls to me to come go exploring.  It sings of the things that are to be found under the leaves.  It whispers the dreams of the tall fir trees.  It does pipe the gentle song the forest sings on gray days.  I hear all the voices calling me.  I listen.  But I cannot go."
~ Opal Whiteley~
(The above quote is the text used on this piece)
When I set out to do what I thought would be a simple three piece series of artwork I had no idea of the depth of discovery I would make about myself or the art making process.  I thought I would share some of my thoughts, impressions, and frustrations along the way.  In a former post I described the "how to" of working in a series, over the next couple of posts I will be revealing each piece in the series individually and sharing what I hope are some helpful tips and thoughts on working in this manner.
(Stray fibers and scraps found new life as bird, egg, and nest)
Each piece of work you create was or is wrought from inspiration and inspiration can be be found anywhere.  This series was inspired by nature, one of my favorite subjects to mimic, thoughts of kindergarten, and my inability to waste something that would normally be tossed into the trash.  

The nature part of my series is obvious, a bird, branch, and an egg appear in each piece and is kind of self-explanatory upon viewing. 
 
 (A handmade "branch" with fiber "moss" supports the dimensional nest)

The background technique for each canvas was developed by both thoughts of kindergarten and some trash I was about to toss.  I am a notorious note taker and love to use colored legal pads.  I had scribbled several pages of no longer needed notes on a blue pad and was tired of flipping the pages to find clean paper.  I tore a hunk of used pages from the tablet and started to toss them but the color of the paper struck my eye as that of complimenting the artwork I was doing.  I used some paint to slightly obscure the writing.  This became a portion of the piecing for the background.

My little grandson has just started kindergarten and he called me to tell me all about his first day of school. I was instantly catapulted back to my first day of school where I remembered the teacher getting us ready for open house.  We were allowed to choose two colors of construction paper and taught to weave a mat that would sit on our desk where we would serve our parents cookies and kool-aid using our best manners.  The background technique was developed from the triggered memory of that little woven paper mat.
 (A bit of metallic lettering gives the piece an unexpected shine and interest.)

TIP:  Inspiration truly can be found anywhere.   When contemplating a series, work with a subject, thought, feeling, or idea that inspires you.  This will ensure that you will stay interested in the work and bring it to completion. 

Continuity of color is key when working in a series.  You do not want your work to look disjointed or too disconnected.  There is a lot more to color than meets the eye.  Color plays two roles in the creation of your artwork: description and composition.  The spectrum of color you use will set a cool or warm tone to your work.  Saturation of color can make your work look either vivid or soft.  
 (The torn edges and burnished edges of the hand painted background fabric gives the piece a rustic textural appeal.)

Color also affects your composition.  It can harmonize or contrast your series.  It unifies your work, sets a visual path, produces rhythm, and creates emphasis.  Strategic placement of color can draw the eye exactly where you want the viewer to be pulled in and have their interest piqued.
 
(Hand stitching adds additional texture and interest plus provides the appearance that the  fabric has been stitched onto the woven background.)

I chose the colors for my series based on nature to compliment the theme.  Blues to represent the heavens and greens to ground the sky to the earth.  Contrasts of hues in grays and browns, that mimic the tones of wood and stone, were highlighted with white and ivory to bring in a balance of  light.  I kept the tones of the paint complimentary to those in nature but with a softer more gentle palette wanting to evoke a peaceful feeling to each work.  

TIP:  Thoughtfully choose the colors you will work with to set the tone, mood, and feel of your work.  
 (Piece one of three complete!)

I hope you have enjoyed watching this series come to completion.  
Thank you all, as always, for all your support and encouragement along the way.
Have a wonderful day!

Part 2: Setting Artistic Goals can be found HERE
 Part 3: Tips for Titling Your Artwork can be found HERE

Thursday, March 8, 2012

BIRD WATCHING...

 Spring is quietly creeping in here at the Quill.  With it comes the return of the birds who have wintered in warmer climes.  We have the usual fare of plump robins decked out in their rusty red vests and brilliant blue birds singing happy trills.  I am most excited to see a pair of wood ducks at the nesting box out back...(Please excuse the clarity of the duck photos, these were taken through a window)

I sat and watched them for a long period of time as she checked out the interior...
And the leafy lawn...
He was only interested in the view...
They have made several return visits but have yet to decide between an old hollow tree, a decidedly rustic summer house in the east wood, or this fancier version of a ducky condo.

I noticed some unusual birds milling around the base of the sturdy old oak where the ducks were visiting, species of which I have never seen the likes of before...
A small flock of five hopping on rocks and posing near candy striped spring beauties...
Perky little beaks...
Beady little eyes...
And strange fibrous feathers...
They too are seeking homes, perches on new art pieces!  
They are nesting nicely in the studio...
Awaiting fashionable new digs...
I hope you have enjoyed visiting my new neighbors.
Any signs of spring in your neck of the woods?
Related Posts Widget for Blogs by LinkWithin