"The bird a nest, the spider a web, man friendship."
~William Blake~ (click any photo to enlarge for better viewing)
I do apologize for the unexpected break I took. I have been having more technical difficulties. It seems my computer went on vacation without me. Can you believe it? It even sent out emails to dozens of people notifying them that I was gone and added on a little business advertisement that I never sent out. While she was on vacation down in what must have been sunny Mexico, (how do I know her destination you might wonder, well, she came back speaking fluent Spanish), she ate some very bad cookies. The cookies corrupted her delicate system and she had to be treated for a virus infection. Poor dear had to toss her cookies. I thought she was on the mend and then I went over to my blog and found out she had been off gallivanting again! This time she came back speaking Portuguese, I kid you not!
(Free artwork image, Vintage Sheet Music page, click, save, and enjoy!)
Seriously, my email was attacked by a repeated vacation notice, my search engine page as well as some other setting were all converted to Spanish, which would be great if I could speak it or read it, and then my blog was converted to Portuguese, which I can't read or speak either! I think everything has been restored to rights and I can get back to posting. So much for having a virus protection program. I think my poor computer was not vaccinated for the proper strain. Anyway, on to my original post...
(Free artwork images, French lesson book page and McGuffey's Sixth Reader page, click, save, and enjoy!)

I just love and admire Dawn (The Feathered Nest) and her work so much. She has such a giving spirit and genuine sweetness that comes through in every post. Dawn was very instrumental in helping me work out the kinks when I first began blogging and her support has grown into a friendship that I truly treasure. I feel I owe her a huge thanks for the lessons I have learned from her nest. Her positive personality and generous spirit are something we can all strive for. It has blessed my heart beyond belief to watch her take tentative steps to share her talents and to see her creative efforts rewarded in print through many of the Sommerset publications.
(Free artwork images, Gregg Shorthand book page and Latin-English dictionary page, click, save, and enjoy!)

Not only I have I learned lessons of the heart and of friendship but I have been privileged to learn lessons of creating art. I feel I owe Dawn an apology and hope that I in no way misrepresented her wonderful tutorials. In a recent post I shared with you a nature assemblage that I did based on Dawn's tutorial instructions. I did use her instructions but made substitutes and changes to make the design my own. I am not really good at making an exact copy, I tend to make it my own by adding my own style. (Free art work images, vintage spelling tablet papers, click, save, and enjoy!)

 I wanted to show you the results of following her step-by-step instructions so that you can see how easily her wonderful style can be recreated and to honor her efforts at creating such wonderful easy to follow guides.
(Free art work image, Blue Jay burying an acorn, click, save, and enjoy!)
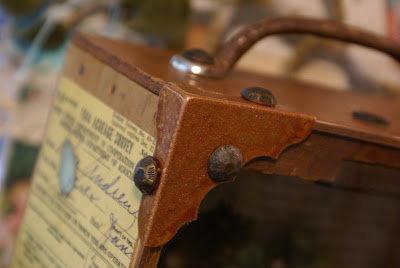
I used an idea Dawn shared in a post quite some time ago in finding shadow box frames at flea markets and removing and replacing the backs to make new shadow boxes for your art. Here are a couple I found recently... I used the larger one for the Nest Assemblage. Sorry for the quality of the photo, taking photos of something encased in glass is very tricky! Any tips on how to cut the glare?
 The only changes I made to this design are the placement and content of the natural elements and I did decorate the back of the box.
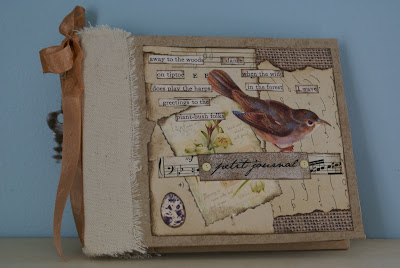
 For the nature journal I followed her instructions, using images provided in her tutorial, a few of my own, as well as the tiny calendar prints I purchased from Mary at Green Paper. I also used some bird, egg, and nest images from Vintage Printable.
 My journal does not have as many pages as Dawn's did.

 I found that my background paper was a little weak so I glued the two page spreads back to back and added some handmade paper to the fold area of each page to strengthen it.

 Dawn did warn that choosing your background paper is very important. Also, my spine seemed a little loose so I did add a ribbon tie to the sewn spine. Other than that, I stuck to the plan.

 Although my sweet teacher, Dawn, gave me an A on my last project, I hope these will make the grade in honoring her tips and techniques. She told me I really did not need her tutorials but I beg to differ. I believe in supporting other artists whether it be buying their work, supplies or kits available through them, or even through supportive comments on their work.
I recently purchased a divine roll of seam binding from Dawn, you can see it featured on the spine of my nature journal...
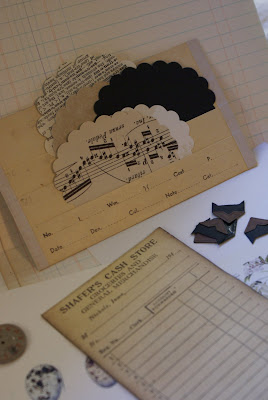
 When the order came in I was in for a real treat! She included a fantastic package of ephemera for using in my art!!! Thank you so much sweet lady, I love it all! Just look at all this paper goodness...
 Don't you love this little watch face?
 Just look how cleverly she packaged these punch outs!
 I thank my "whatsoever" friend for her wonderful lessons from the nest!
 "Whatsoever things are true, whatsoever things are noble, whatsoever things are right, whatsoever things are pure, whatsoever things are lovely, whatsoever things are admirable...think on these things."
 (This is how I think of my friend, Dawn.)
~Philippians 4:8~
Blessings,
Miss Sandy
P.S. It seems I have some homeless art pieces on my hands...looks like it getting close to time for a give away! More details next week!
 Exciting things are happening around the Quill. We are anticipating the birth of our first granddaughter who is due in three weeks, today is Darling Daughters 21st Birthday, and Sunday was the anniversary date of my second year of blogging! I thought I would celebrate with a little give away.
 Before we get to the give away I wanted to share another piece of exciting news...coming soon in the very near future to a blog near you, I will celebrate the grand opening of a boutique here at Quill Cottage to sell my artwork. So many of you kind souls have expressed interest in my work and I thank you from the bottom of my heart. Here is where I need your help, what to name the boutique? I thought of Quill Cottage Creations or The Boutique at Quill Cottage, but I am not so sure about either. What would you suggest? It needs to be something that is identifiable with me. I would really love to have your input. I will be sharing more about this in another post, on to the give away...
 I would like to offer a couple of my most recent projects as prizes in this give away, the Nest Assemblage....
 and Nature Journal...
 from my last post. Visit here to see journal page details. Along with each of these I will include an assorted original ephemera pack for creating your own art.


