I don't often share my play time in my art journal, mostly because it contains experimental techniques, testing of supplies, etc. and its not my normal form of artwork just something I enjoy. I thought I would share a walk through of supplies and steps I used to create one of my play pages that will go in my recently created loose leaf cereal box journal.
None of the techniques on this page are new or particularly exciting, in fact I call this lazy art journaling. I only used what was within reach of where I was perched on my stool and I used printed papers and images giving them a painterly look by enhancing them with layers of colors from various supplies, a little shortcut to a quicker page if you don't want to do all the drawing yourself.
Scrapbook Paper in 3 coordinating patterns - I used some old K&Co. papers from my scraps
2 Old Book Pages
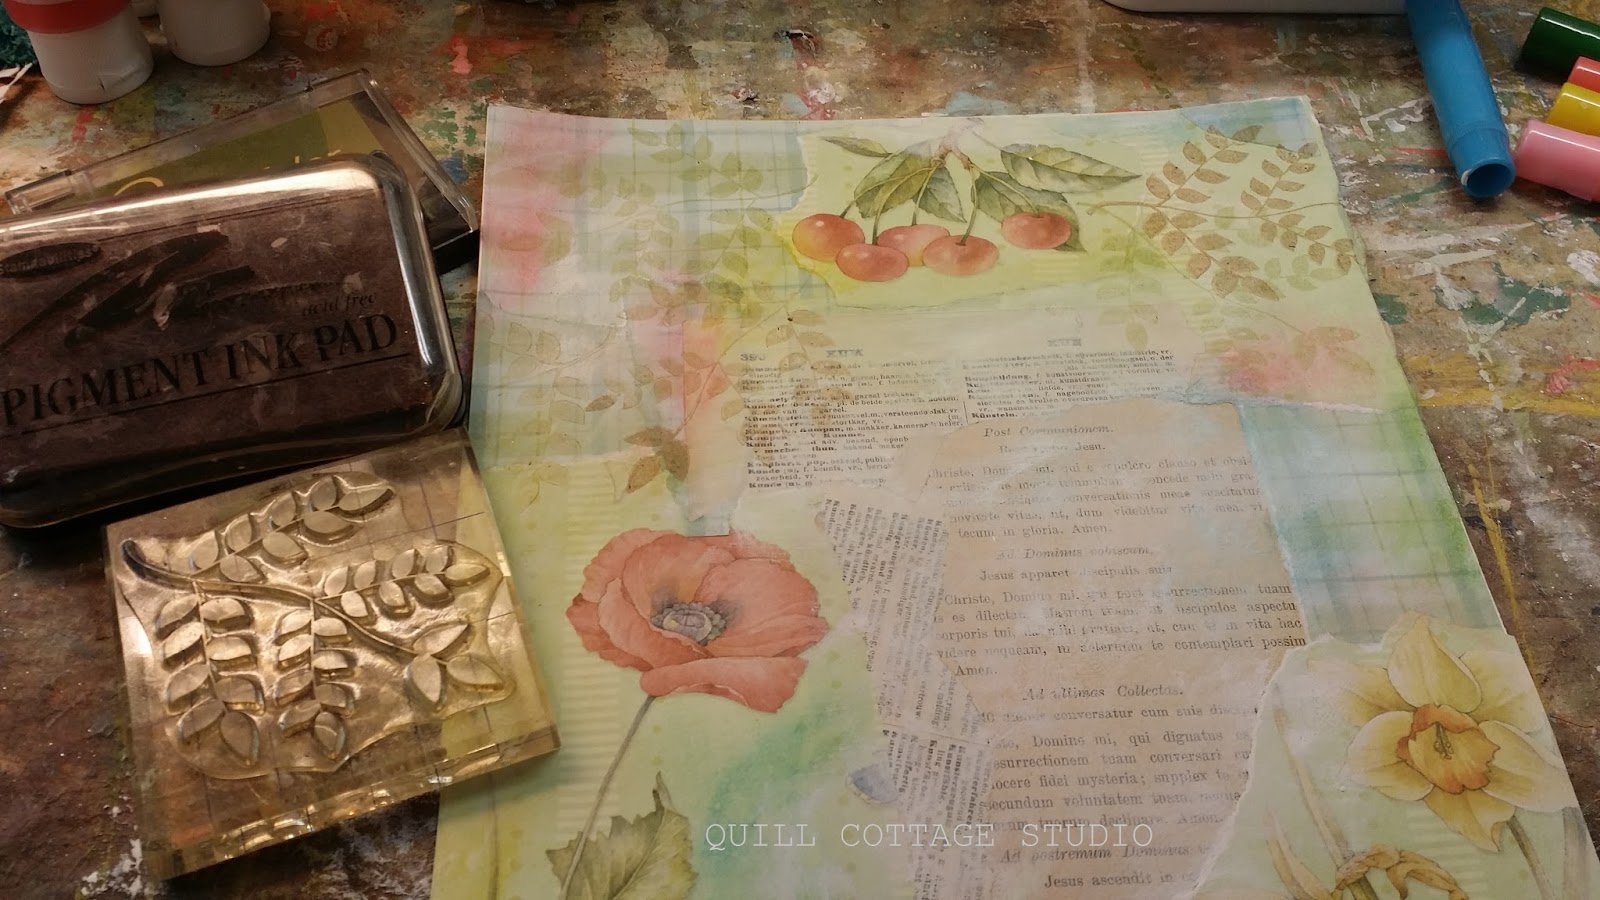
Rubber Stamps: French Script and Fern Leaf
Foam Alphabet Stamps: letters PLAY
Clear Cling Stamp: Leaf Branch
Delta Ceramcoat Paint: Black, White, Sea Foam, and Watermelon
Folk Art Paint: Sawgrass
(paints available at Hobby Lobby, JoAnn's, Michael's, and Wal-Mart stores or can find online)
Black Ultra Fine Point Sharpie Permanent Marker
6B Graphite Pencil
Chalk Pastels: Gold and Brown
Scrap Pieces of Mesh
Paper Spine or Stencil of your choice - this was off a piece of paper I tore out of a pad
Makeup Sponge
Fine liner Brush
Water
Tracing Wheel - as used for Sewing
Bottle Dauber or round piece of sponge or your finger (makes great circles!) - mine is one you get at office supply store for dampening stamps
Scissors
Heat Gun or Hair Dryer
Print out of a Bird (about 4x6) - can be an outline like mine or a colored version of a realistic bird
LET'S PLAY!
NOTE: I did not go into detail of the use of Watercolor Crayons or Gelatos as that information is provided on the packaging, just follow manufacturers instructions for use.
*Tear up your scrapbook papers and book pages laying them dry in a pleasing composition on one piece of your Bristol Paper. You want to keep the papers rather large as this will be blocks of color and pattern that will show through as part of your over all design.
*Using the Paper Matte Mod Podge begin gluing the papers to your second sheet of paper by removing the back most papers and gluing them first, smoothing out all the wrinkles. Continue in this fashion working from the back most papers on your design page until you have all the papers transferred and glued down, this method helps you to keep the papers in the place and order you want them.
*Brush Mod Podge on top of all papers and dry with heat tool or hair dryer.
*Use Gelatos to color small areas then rub them with your finger tip to soften and spread.
*Use white craft paint to create a dry rubbed areas across the paper surface. Dip the tip of your finger in a little water and pick up a little white paint on same finger. Rub and spread paint across the surface to create some highlighted areas.
Dry with heat tool or hair dryer.
*Use Bamboo Ink Pad and leaf stamp to stamp three sets of leaves across top of page.
*Use Brown Ink Pad and same leaf stamp and over stamp a couple of sets of leaves over the green ones.
*Repeat the above process first using the bamboo ink then the brown ink with the fern stamp across the bottom of the page.
Dry with heat tool or hair dryer.
*Use paper spine or stencil of your choice to add another layer of interest by using a makeup sponge to lightly daub paint (Watermelon) through the spine or stencil, an odd number of these is pleasing to the eye.
Dry with heat tool or hair dryer.
*Use Tracing wheel and paint (Sea Foam) to create more page interest by rolling wheel through the paint then roll it across your page, it leaves a little dotted design. (I made big "X" shapes on my paper)
Dry with heat tool or hair dryer.
*Use a piece of mesh, makeup sponge, and paint (Sawgrass) to create more random patterns and layers to your page.
Dry with heat tool or hair dryer.
*Use French Script rubber stamp and brown ink pad and random stamp page.
Dry with heat tool or hair dryer.
*I used Gelatos in pink, coral, and yellow plus watercolor crayons in white and brown to enhance the paper printed cherries and flowers.
Dry with heat tool or hair dryer.
*I used chalk pastels (brown & gold) to outline and shade fruit and flowers.
*I used watercolor crayons (white & light green) to enhance and highlight leaves then used a black ultra fine Sharpie to do some sketchy outlining of fruit and flowers.
Dry with heat tool or hair dryer.
*Cut out bird shape, glue down with Mod Podge, coat top of image with Mod Podge.
Dry with heat tool or hair dryer.
*I layered and blended Gelatos (blue, green, orange, yellow, red, white, coral) to the birds body, then did a little highlight and shading with watercolor crayons (white & brown).
I shaded around the bird with chalk pastels (gold & brown)
Dry with a heat tool or hair dryer.
*Using a black ultra fine Sharpie I outlined the bird and feathers in a sketchy outline.
Some lines did not show up well so I went back in with a fine tipped liner brush and black watered down paint to do a little more outlining.
Dry with a heat tool or hair dryer.
*Using sponge dauber (or finger tip) and paint (watermelon, sawgrass, sea foam) I created a few random polka dots on the page.
Dry with a heat tool or hair dryer.
*Using a piece of mesh, iridescent medium, and makeup sponge, I applied medium through mesh, lifting mesh straight off to leave a raised textured pattern. (this stuff is amazing, my first time to use it, it has a pearl shimmer to the finish and really gives the page pop!)
Dry with a heat tool or a hair dryer.
*Add personal markings to page by using black ultra fine Sharpie. I placed dots around the edge of all my large painted polka dots and small "X" shapes between my square stencils.
*Use Gelatos in white and accent color to highlight and shade large polka dots.
Dry with heat tool or hair dryer.
*Use graphite pencil to draw and smudge an outline around the bird to make it pop off the page more.
*Use brown chalk pastel to shade around large polka dots, repeat using graphite pencil.
*Use brown ink pad and gently rub all outside edges of the paper for and aged look.
*I used a brown ink pad and foam stamps to stamp the word "PLAY" on my page and dried it.
I then used a white Gelato to highlight the letters.
Then I used a black ultra fine Sharpie to sketchy outline the letters.
Lastly I used a graphite pencil to shade the letters.
*For a finishing touch I scribbled a quote that feels meaningful to me at this time:
"The one thing that you have that nobody else has is you.
Your voice, your mind, your story, your vision.
So write and draw and build and play and dance and live as only you can."
~Neil Gaiman~
*Look over your design and go back to enhance, shade, or highlight any areas that might need it.
*To finish off the piece I sealed it with a matte fixative to protect it from smudging.
Once completely dry loose page may crinkle a bit from all the mediums, weight down for a day or so to get a flat sheet.
This technique could easily be applied to a canvas or journal cover as well.
Use as many or as little of these tips and supplies to create your own lazy journal page, grab whatever is within reach and play!
I would LOVE to see them!
blessings,
Sandy
To see the daily happening or inspirations from The Quill, follow on
Facebook!


 In the corner is an old column, from the same friends as the cabinet, that the Handy Man cut down so I could use it for display. A glass vase filled with beach sand, driftwood, and a another glass vase on the inside holds a candle. A couple of iron shell hooks hold my favorite shell gathering bag and my newest art quilt...