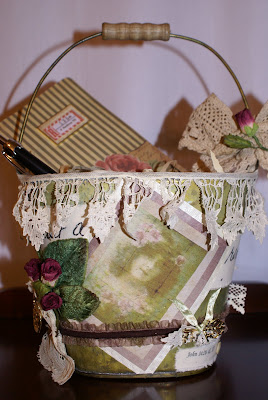
I was in charge of decorations for one of the showers a couple of weeks ago. I shared these invitations I made in an earlier post. (click on photos to enlarge for better viewing)
 The colors for the invitations were inspired by a baby planter with a soft pink silk arrangement in it that was given to the mother-to-be as a gift when she was born. Her mother saved it and wanted to use it as a center piece for the shower. It had traditional baby colors of soft pink, baby blue, butter yellow, and a minty green and had an ABC motif. I repeated these colors and motifs in the invitations as well as the decor.
While I am on my blog break, the next few scheduled posts will be tutorials making the invitations, some of the decor items, and a couple of gifts. I hope you will enjoy these sweet little items and ideas. Maybe you will be able to incorporate them into your special celebration or maybe they will be a jump start for ideas for party favors or gifts.
Each party, shower, or celebration must start with an invitation. Above I have given you the inspiration for the invitations, here are the particulars in making them. Below I am including the two images I used as a little gift for you to use in your crafting. Feel free to copy them or save them to your computer.

 This invitation can easily be adapted to use for a baby boy. I have included the changes and photos for those adaptations at the end of the instructions.
MATERIALS YOU WILL NEED (PER CARD)
Square CD mailer envelope, my envelopes were 5" x 5"
Card stock for card base, 8" x 4 3/4", I used a cream color, save your scraps to punch out the four small squares for the BABY motif.
Solid yellow paper
Solid blue paper
Solid pink paper
Alphabet rubber stamps
Pink Ink Pad
Pink crepe paper streamer
Pink ribbon
White Lace trim
Vintage baby images
Glue stick, hot glue, spray glue (optional)
Wallet size (2 1/2" x 3") photo of the baby or mother-to-be (optional)
Decorative scissorSmall Square Punch, one that punches 1/2" x 1/2" squares
Needle and thread
INSTRUCTIONS:
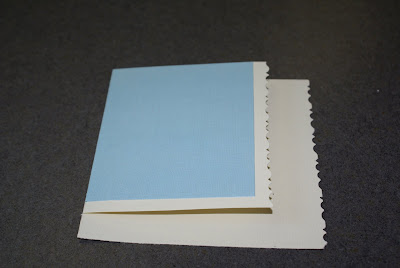
* Fold the card leaving a 1" overhang on the back of the card and trim both side edges with a decorative scissor. Trim away 1/2" from the bottom front of the card.


 * Using the solid blue paper, cut a 4 1/4" x 3 1/2" piece and apply to the front of the card using a glue stick or spray glue.
 * Cut a 12" piece of pink crepe paper streamer. Cut strip in half length wise using a pinking shear. With a needle and thread, gently gather straight side of streamer. Adjust gathers to fit the bottom edge of the front of the card and gently flatten the ruffle. Glue in place using hot glue. If it extends over the bottom edge of the back of the card, trim away the excess with a pinking shear.


 TIP: When I gather the streamer, I leave a three inch tail at the beginning so as not to pull to the thread all the way through and to allow for adjusting gathers. To adjust my gathers a dab a bit of hot glue to one edge of the card and press my streamer end to it. This anchors the ruffle and makes it easier to work with. After my gathers are adjusted, I dab a bit of hot glue on the other end and then anchor the rest with a bead of hot glue.
* Glue a piece of white lace trim or ribbon over the top of the gathered streamer covering the raw edges using hot glue. Tie a small pink satin bow and glue in the center of the trim using hot glue.


 * Glue the vintage baby image to the fold side of the card front, centering, using a glue stick or spray glue.
 * Using the small square punch, punch out four cream colored squares from your scraps.
 * Stamp each square, two with the letter "B", one with an "A", and one with a "Y". Allow ink to dry.
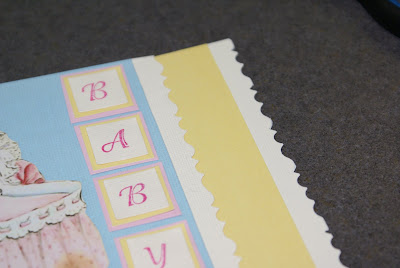
 * Mount stamped "BABY" squares using a glue stick to solid yellow paper and trim leaving a small border around the square. Repeat this process by mounting that square onto pink paper. Glue each completed square to the front of the card as pictured.
 * If you choose to add a photo of the baby or mother, mount it to a piece of solid yellow paper with a glue stick, trimming, leaving a small border. Repeat mounting to the blue paper. Repeat, mounting to the pink paper. Adhere to the inside front of the card using a glue stick or mounting tape. Using hot glue, add a single layer satin ribbon to the inside bottom of the invitation just over the top edge of the ruffle to finish off the inside front cover.
 NOTE: If you do not use a photo, use the smaller second vintage image on the inside of the front card flap.
 * Cut a 3/4" x 4 3/4" strip of yellow paper. Mount 1/4" from the outer edge of the card back, using a glue stick. This will peek out of the card and highlight the decorative front edge.
 * Cut a 3 1/4" x 4 1/2" piece of solid pink paper and a solid piece of yellow paper slightly smaller. Glue the pink paper to the inside of the card back. Layer the yellow paper over the pink. This is where you will add you invitation information. I used a lined rubber stamp and pink ink to create mine, handwriting the information using a pink gel pen. You can use a stamp or print the information directly onto the yellow paper and then cut it out and glue it in using a glue stick.
 * Optional: On the back I used rubber stamp that says, "Handmade By" and signed and dated each card using a pink gel pen.
 * Glue the vintage image to the outside of the envelope, address, and add postage.
NOTE: Be sure to have these weighed, most used standard postage but a few went out of state and required extra postage.
 * For an envelope seal I used the second vintage image, gluing it in place with a glue stick.
 NOTE: To change the invitation to suit a baby boy, simply change up the colors a bit following the same steps as above with the minor changes below.
 * For the graphic, use the baby on the pillow.* Trim the card edges using a less feminine scissor.
* Use two layers of coordinating crepe paper streamers, cut one strip in half using the pinking shears and the other 1/4 the width of the strip. Do not gather the crepe paper strips, glue them on flat layering the small strip on top of the wider strip. Use a plain white thin satin ribbon and bow to finish the piece off.
 * Stamp and mount the "BABY" letters as described above only stager them across the top of the card, slightly overlapping, centering the vintage image below the lettering.
 These examples could also be used as birth announcements, simply stamp out "GIRL" or "BOY" instead of "BABY"!
Perhaps you would like to present a set of these to the new parents to be used as Thank You Cards, simply make them according to the instructions, using a rubber "Thank You" stamp on the inside where they can then write their thank you message! TIP: When I do this I also include postage on the card set for the parents convenience.
A pretty way to bundle these up as gift is to present them in a dainty diaper!

 You will need:
A Vintage Handkerchief that coordinates with your invitations
A Diaper Pin
Re-positional Double Stick Tape
* Press the handkerchief flat, fold it into a triangle and press.
 * Fold center point up and press.
 *Open the handkerchief up lay the stack of cards and envelopes with the bottom lining up with the pressed fold line.
 * Fold each side point to the middle, if needed, secure hanky fold to hanky fold with a bit of re-postional double stick tape.
 * Fold up the bottom point and pin with a diaper pin!
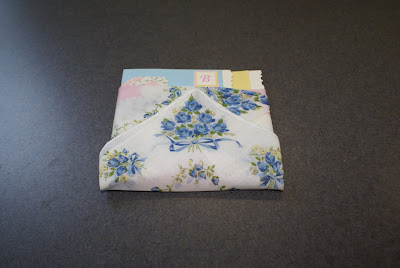 For an added touch, add postage to the envelopes and tuck in a matching gel pen to aid the busy parents in expressing their thanks!
I have to tell you that the mother and father of this little baby were ecstatic over these. Proud grandpa took his to work and sat it on his desk to show off his first grandchild. Grinning grandma cried all over me. I think they were a hit!
In the next tutorial I will share a little twist on an old tradition, a corsage for mommy that can become a little decor touch for baby's room! Stay tuned!
Blessings,
Miss Sandy


