Star light,Star bright,First star I see tonight,I wish I may, I wish I mightHave the wish, I wish tonight! If I were to wish upon a star at this very moment my wish might be that Christmas would come just a tad bit slower as indicated on the paper star in the photo below...
 Every year I think I am going to get a jump on things and have many things done in advance so I can just savor this season but it never seems to happen quiet that way. I am swept up in the tide of making, baking, decorating, and celebrating, all my good intentions of slowing down thrown out the window while getting caught up in the spirit of creating a memorable holiday.A tattered tinfoil star brought everything into perspective for me this weekend and as much as I want to tell you about it, I am saving that story for later in the month, for I must choose my words wisely in the telling of its tale and I must hug its story my own heart just a little bit longer. In the meantime I wanted to share another star with you, an ornament tutorial that I think you will enjoy.
 Last year I found this star tutorial and printable pattern at Lost Button Studio. I am making up a few this year too and thought you might enjoy them as well. My only tips to making these are: use card stock as a base and glue decorative paper over that to give them the weight they need to hold the folds and not flatten out (I used spray glue to adhere my paper and card stock) and to keep the hold I turned the ornament over and added a generous dollop of hot glue to the center and placed a decorative button over the glue to cover it (I like the back pretty too!), this helps cement the folds and holds the ornament in shape better. Have fun folding and embellish away!
Wishing you all a wonderful day! 
 Happy Friday dear friends! I hope you all had a wonderful Thanksgiving. Today I am joining Debra of Common Ground for Vintage Inspiration Friday: What's Inspiring My Decor This Christmas.
  Right now I am being inspired by the thought of snowflakes! We don't have any here yet but they are in the forecast and I love snow!
With our hearts filled with gratitude it is now time to turn our thoughts towards Christmas. Part of the pleasure of Christmas for me is making some sort of package topper, sort of a gift before the gift. Usually I try and come up with some kind of simple ornament. What better way to experience that childlike joy of Christmas than to play with childlike craft supplies like glitter and pipe stems.I was playing around with an idea for an embellishment I wanted to make with wire and grabbed up a pipe stem to practice with and ended up liking the results. I think it is fun to elevate the ordinary and I hope you will agree that these little ornaments are a cut above kindergarten crafts. I promised you a simple snowflake tutorial and here it is: (All photos in this may be enlarged by clicking for better viewing.)
MATERIALS:*6 pipe stems per snowflake*Wire cutter*Glitter*Misc. embellishments of your choice - beads, pearls, junk jewels, buttons, lace, trims, etc.*Craft Glues - I used a combination of hot glue, matte gel medium, Tacky glue, Clear drying gel glue, and a glue stick*Paper - Sheet music, book pages, etc. of your choice*Card stock*Mini clothes pins*Brown ink padINSTRUCTIONS:Bend pipe stem in half Bend ends up, creating a " W" shape, bends are approx. 1/2 inch
 Bend ends down as shown below
 Cross ends over one another and twist one time just below the previously bent area creating three tips
 Slightly bow out sides of loose stem ends, cross over ends leaving 1 inch tails and twist as shown below
 Repeat for remaining 5 stemsLay one snowflake tip on top of another one, twist right ends of stems together, gently pull open laying another section together, always twisting to the right, repeat with remaining sections. Once you reach the last one twist the left end of the first and last ones joined.

 Gently press snowflake flat, shaping and bending as desired.
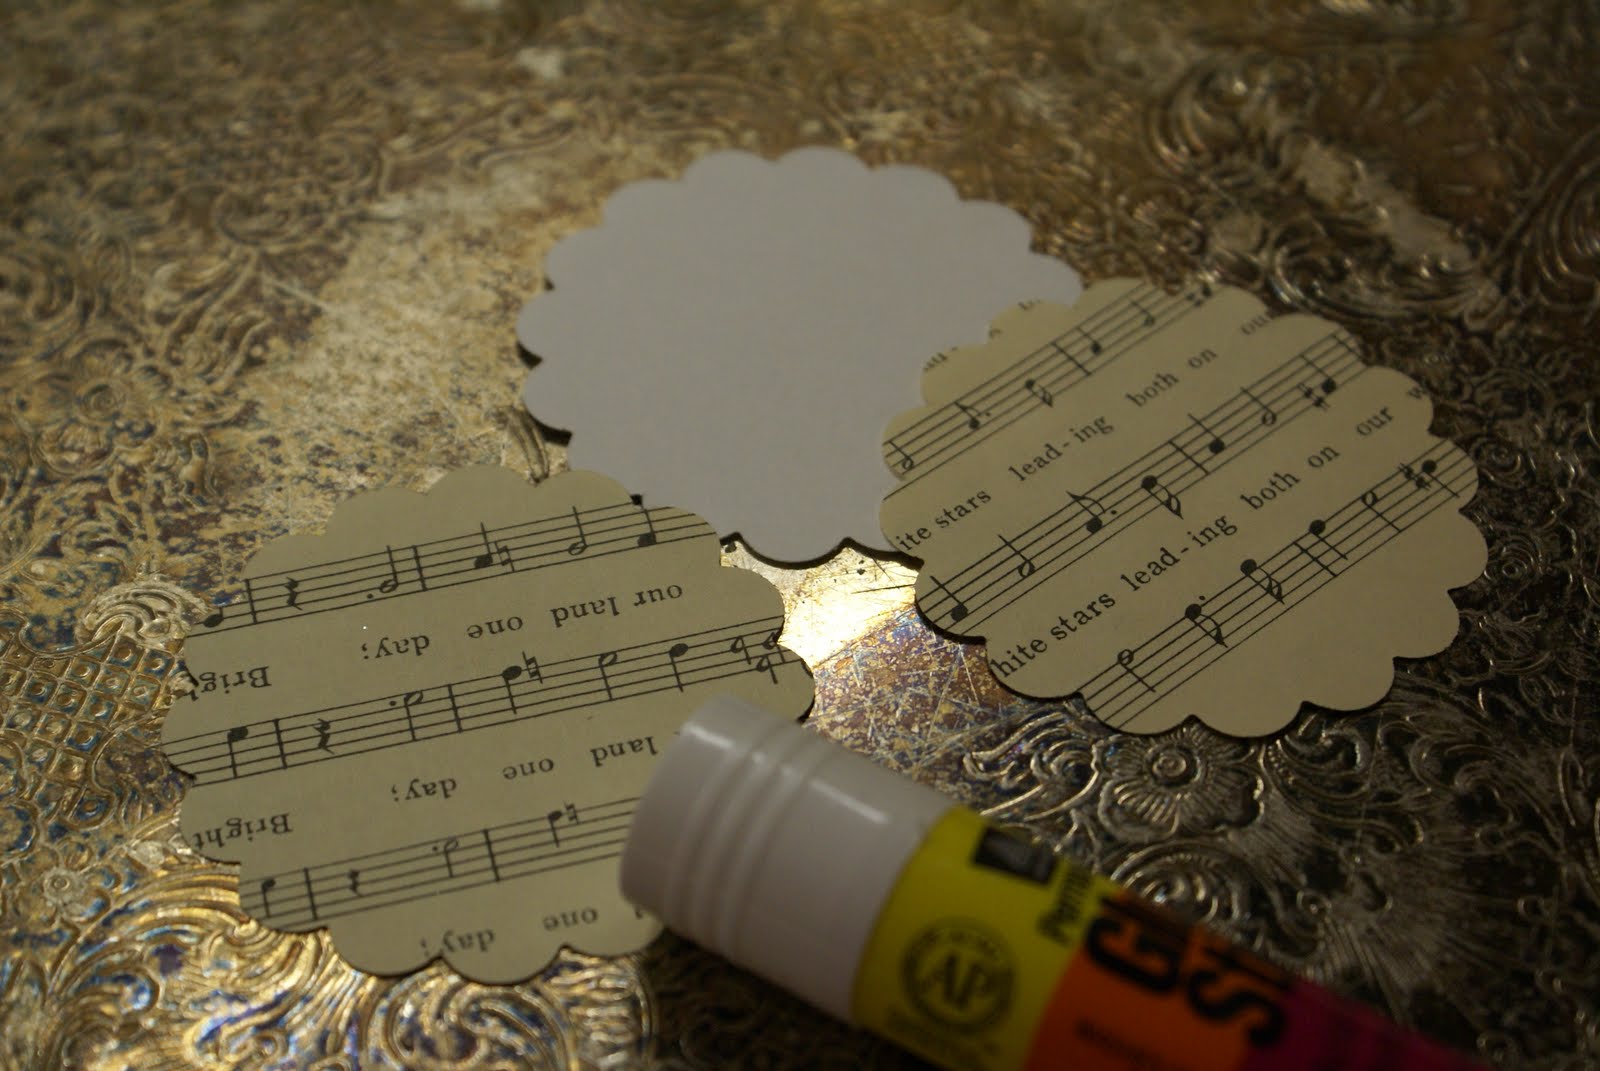
 Cut a 2 1/2 inch circle of sturdy card stock and two 2 1/2 inch circles of your choice of paper. (Note I used a paper punch but a cut circle will work just fine if you don't have one)
  Using a glue stick, glue together sandwiching card stock in the middle, inking edges if desired
 If you plan to use this as a gift tag, only cut and glue one piece of paper of your choice to the card stock, stamp a " To & From" on the blank back side.
 Hot Glue snowflake to center of circle leaving the loose ends up, if the center tips are a little wonky just clip them evenly with a wire cutter.
 Cut six 2 inch by 2 inch squares of paper per snowflakeOptional: Ink edges of paper squares, front and back, by bushing ink pad across them, this gives and antique or aged look
 Curl paper squares into a cone and place a bead of craft glue (I used Tacky glue) down the seam as shown below
 Clip with a mini clothes pin to hold until dry, then remove clips, with Tacky glue this does not take very long at all
 Glue a paper cone between each snowflake tip as shown below
 Brush white craft glue (I used Elmer's) into the cone tip and sprinkle with glitter, allow to dry

 Embellish your snowflake in any way you desire. Enjoy!Here are a few ways I decorated some of the ones I made with a few extra tips and tricks to make unique snowflakes, let's start out simple...This one keeps embellishment to a minimum, just simple mother of pearl buttons, and no messy glitter if you want to skip that step too. This one also shows that you can reverse the paper cones for a different look:
 Don't want to make the paper cone part? No problem, here are a few versions without them, simply reduce the size of your center circle to 1 inch and glue to back of snowflake, embellish as desired. For this one I simply glued pearl strands down the center of the tips and added a pearl bead center.
  This one is done the same way only using silver bead strands extra clips of pipe stems are twisted around the tips and glued to the center to give it more dimension with a snippet of vintage tinsel added to the center.
 This one substitutes the paper tips for some store bought mini tree ornaments, these have the elegance and look of a heavy glass crystal but are light weight plastic. The center is another craft store mini tree ornament. Additional beading has been added to the center of each tip and will be demonstrated a little further in the post.
 This message snowflake has clear rhinestones glued to the tips, vintage pearl beads on the loose center tips, mica flakes glued inside the cones, and a bubble message in the center.
  To make a bubble message print out a word onto paper of your choice making sure it is sized to fit behind a clear glass piece, you can get these in the floral section of most craft or hobby stores. Use a clear drying gel glue, put a dot of glue on center flat back of bubble glass piece, press onto word making sure glue spreads to the edges, allow to dry, cut out around glass piece and glue to snowflake center.This one has crepe paper ruffle glued onto a decorative sheet music punch out. Vintage tinsel wraps the tips just below the three points and is glued between the paper cones. A fine tip edge of silver glitter rings the front outer edge of the cones.
 Here is one done in gold, the center is an old broach:
  I used a pretty paper girl dusted with Martha Stewart Ultra Fine Glitter and accented her with feathers, lace, vintage velvet posies, and raspberry beads. A hint of teal gives this on a little pop of color.
 Here is a pretty one all done up in pink. You did not think I would do one with out a bird did you? This one is my daughters favorite. I hand wove the nest from fibers and wire adding three little vintage pearl eggs and glittered a little ready made bird to further embellish the nest, pink and silver glitter, shell buttons, and mini rhinestones round out the sweet design.
  Here is a silver stunner that glimmers with mini mirror tiles, glass beads, pearls from an old necklace, and a dusting of silver glitter.
 Now let's get a little more complex in the design by adding some beading and heavy embellishing, my favorite! Call me crazy but I decided to step away from the traditional colors and see what would transpire. I love these next two! The remind me of velvet and to me they are quite opulent. I bet you never thought you would here that word used in reference to a pipe stem!
 To add beading to snowflake tips string beads of your choice onto matching pipe stem
 Hot glue tip of stem to base and allow glue to set
 Adjust beads so they are centered, wrap end of pipe stem around tip a couple of times ending in the back, clip excess off with wire cutter
 Lastly, I made up this little snow bound cutie. I am not even going to try and explain this process, didn't turn out quite like I envisioned but not all things do.
 I have so many more designs I want to try out. I might need an intervention to Snowflake Makers Anonymous! I hope you enjoy trying out the tutorial and if you missed previous years Christmas tutorials you can find those HERE, HERE, HERE, HERE, HERE, and HERE!
And if that is not enough snowy goodness for you I saw these WONDERFUL paper snowflakes at Maggie Grace Creates: Teresa used the tutorial from Cherished Vintage. Don't they look stunning hanging from her chandelier?
 (Photos used by permission, property of Teresa at Maggie Grace Creates)
I have to give these a try!
Happy crafting and I'd love to see your creations if you try any of these tutorials out.
Have a wonderful weekend!


 If I were to wish upon a star at this very moment my wish might be that Christmas would come just a tad bit slower as indicated on the paper star in the photo below...
 Every year I think I am going to get a jump on things and have many things done in advance so I can just savor this season but it never seems to happen quiet that way. I am swept up in the tide of making, baking, decorating, and celebrating, all my good intentions of slowing down thrown out the window while getting caught up in the spirit of creating a memorable holiday.
 Last year I found this star tutorial and printable pattern at Lost Button Studio. I am making up a few this year too and thought you might enjoy them as well. My only tips to making these are: use card stock as a base and glue decorative paper over that to give them the weight they need to hold the folds and not flatten out (I used spray glue to adhere my paper and card stock) and to keep the hold I turned the ornament over and added a generous dollop of hot glue to the center and placed a decorative button over the glue to cover it (I like the back pretty too!), this helps cement the folds and holds the ornament in shape better. Have fun folding and embellish away!