


I am continuing that theme of leftovers in this post by sharing with you how to turn some simple paper punches into elegant ornaments. Feel free to save or print this tutorial for your personal use. Enjoy!
Now, let's dip into our leftover bowl and get crafting!

MATERIALS:
* Paper Scraps - Make sure the paper you use has some weight to it, I tried some book pages but the paper was too flimsy. I used some small left over pieces of vintage sheet music. If you use vintage paper make sure it is not brittle.
* Fabric Scraps
* Paper Punches - You want a simple shape like a circle, scallop circle or oval, scallop flower, etc.
I used the following punches: Fiskars Large Squeeze Scalloped Oval Punch, Slim Punch (Real Estate Sign) by EK Success, Martha Stewart Christmas Dove Medium Punch by EK Success.
* Jewelry Making Supplies: Eye Pins, Jump Rings, and Wire all in matching finish
I used Vintaj brand products, eye pins, jump rings,and wire (These were leftovers from making charms for my daughters wedding favors)
* Beads in various sizes
* Misc. Embellishments of your choice
* Scrap Ribbon for hangers - I used seam binding by ZipperStop, Hug Snug in Winter White
* Scissor, Wire Cutters, Tweezers, Needle and Thread
* Glues - Aleene's Tacky Glue, Hot Glue, and Elmer's School Glue
* Rubber Stamp of your choice and ink of your choice
CHRISTMAS DANGLE ORNAMENT:

Dangle Top:
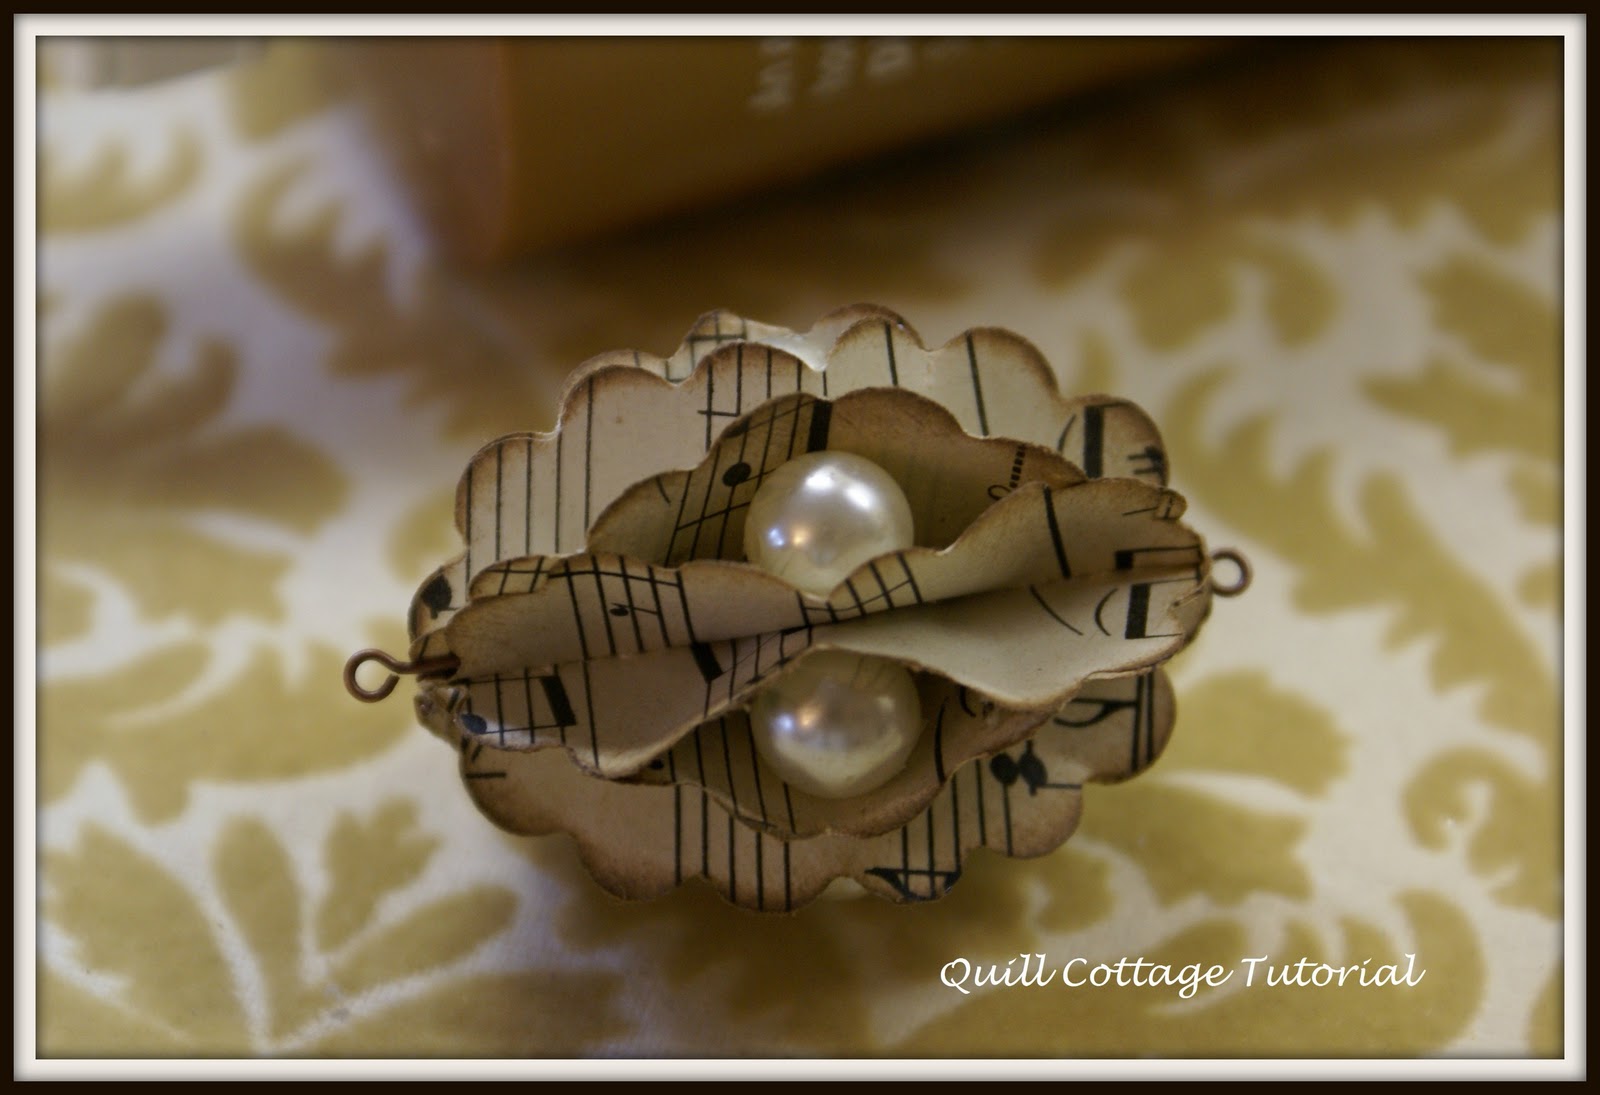
* Using craft punch, punch out 8 paper shapes - I used the Fiskars scallop oval punch

* Ink front and back edges of punch outs, stack 6 of them together and set 2 aside

* Sew down the middle of the stack of six making sure to back stitch to lock thread ends, trim off excess thread ends, separate folded layers


* Run a thin bead of tacky glue down the sewn seam and place an eye pin in the glue with the eye extending past the end of the paper punch, repeat on the back seam and allow to dry.


* Starting with one seam side of your punch ornament place a very small dot of tacky glue on ends as shown below, making sure to leave middle of punch flaps unglued, press into place. Flip over and do other seamed side. Repeat with remaining flaps, you should end up with six sections when you are done


* Once dry, use a tweezer to open up center section of glued flaps, add a dab of tacky glue and glue bead of your choice into the center of the flap, repeat with remaining 5 sections and allow to dry.


* Brush each section between beaded flaps with Elmer's glue and sprinkle with glitter, shake off excess, allow to dry. Once dry add a jump ring to each eye pin.
Dangle Center:
* Rubber stamp one side of each of the two extra punches

* Place glue on unstamped side and 2 head pins with an eye showing past the edge of the punch on opposite ends, sandwich with other extra punch making sure stamped side is out and press into place, allow to dry


* Embellish and glitter both sides as desired - I used mini craft mirrors, beads, and shabby mini muslin roses (Rose tutorial below)
* Wire and bead between each completed section, add ribbon to top jump ring to hang ornament


Shabby Muslin Rosette:
* Tear a 1/2 inch strip of muslin or fabric of your choice

* Tie a small knot on one end of strip

* Fold tail to back of knot and tack in place using a needle and thread

* Twist tail end of fabric strip and begin to wind around knot, tacking with needle and thread as you go


* Continue until you get a diameter of about 1 inch, clip off excess fabric strip leaving a 1/4 inch tail. tack tail to back of rosette, knot thread and clip

* Embellish as desired.
Want a more simple version? Leave off the top dangle as shown below:

BUTTONCICLE 2.0 Version:
Want a super quick and easy dangle, why not bring back the Buttoncicle, full tutorial found HERE, add a few more beads on top and the center section of the dangle as described above!

JOY BANNER DANGLES:


* Rubber stamp a design on one side of each punch out and ink edges

* Add eye pins as described above adding jump rings


* Tear strips of fabric and glue onto top banner piece, stamp or write the word "JOY" on the top piece of fabric


* Wire and Bead, Glitter and Embellish as desired, add ribbon hanger

In the next post I will show you how to make a beautiful Paper Fringe and Flower Lighted Garland for your tree!

Blessings,
Sandy
19 comments:
All this beautiful work and yet you have nothing in your curiosity shop to sell?!
There seems an injustice in that, Sandy, but I do thank you for sharing how to make these lovely ornaments!
These lovelies take my breath away! How do you do it? I know you showed me, but how do you keep creating the most exquisite things? I want a tour of your house. Maybe just your studio would be fine. I'd love to make something half so fine. Perhaps I will try to stretch a little further.
These are so pretty, Sandy. Thank you for sharing your creativity with us.
Sandy these are gorgeous! Thank you for sharing.
Danielle
This is a lot to take in, but great tutorials and some I will have to try because they are so pretty and would make a great ornaments on a small tree I have. Thanks for sharing.
Really stunning! Thanks for sharing~ Lovely!
Hi Sweet Lady!
It looks different over here! I haven't been visiting in forever, nice to get away. Your a busy gal, making all these tutorials... very nice.
You are so talented. Hope you had a good Thanksgiving.
Wishing you a blessed week
Rebecca
Hi Sandy,
Thank you once again for the great ideas for using our scraps! I love it! And will definitely try these! You are so generous to share with us at this busy season!
Blessings and hugs,
Sonya
They are all so gorgeous!! Thank you for sharing your creativity thru wonderful tutorials!
Blessings,
Cindy
Oh Sandy, they are fantastic beautiful, love how you used the pearls, and every ornament is a fabolous piece of art- Thankyou for sharing this tutorial with "me" and for the lovely photoes showing every step.
Hugs,Dorthe
Has anyone said it lately? You are freaking AMAZING. You are- I adore all that you do. So getting a compliment from you is of the highest.
tammy
Wow. Thank you so much for sharing. These are stunning. Jingle bell joys...
these are so nice, have to try them. thank you for sharing. Merry Christmas.
So pleased that I happened upon your tutorial. The ornaments are delightful, thank you for sharing!
Hugs
Cxxx
Oh, Sandy, these are WONDERFUL!! They look so intricate but you've done a beautiful job of making the actual process so simple. Who'd have thought to use the jewelry wires to create a hanging method! Only you, clever girl! They're beautiful and I can see what I'll be doing later today!
Blessings to you, Dear Friend and thank you for all of the lovely tips you shared so generously.
Hugs, Diane
You are so talented, what a beautiful way to make an ornament. I would love to try it, don't have a punch though, may have to improvise :) Thank you for the tutorial.
Aloha Sandy, I bounced over here from Karen's Desert Cottage as she blogged about your ornament tutorial. I just had to take a peek.
Thank you so much for sharing your tutorial with us. Your ornaments are beautiful. I can't wait to see more.
Have a wonderful Christmas!
These are so lovely! My favorite ornaments of the year! Thank you so much for your in depth tutorial and beautiful pictures! I feel so blessed to have found you.
Oh, I'm in love with these. I have the punches, and must try making these lovelies. I'm a pianist so the sheet music is near and dear to my heart. Thanks you so much for the photo tutorial, I need that. I found you through pinterest and am your latest follower. Lovely blog! ~ Abby
Post a Comment