


"Some people were born to make the world more beautiful."
-Hallmark-
 Welcome to the 3rd annual Where Bloggers Create 2011 blog party! A huge "Thank You" goes out to our hostess, the lovely and talented (and my personal blog fairy god mother who magically designed this blog!) Karen of My Dessert Cottage. I have been eagerly awaiting this party all year long! This is the debut of my newest studio space and I am thrilled to share it with you all. I have given some snippets and sneak peeks but in this post you are getting the whole enchilada!
For those of you who may be new visitors, I am Sandy, Miss Sandy to my nearest and dearest, I am a mixed-media artist and free lance writer. I am blissfully wed to my high school sweet heart who is known on this blog as Handy Hubby. I have two grown children, a son and a daughter, both of whom are married. My son has blessed me with two delightful grandchildren. I can't remember a time when I was not making something from early childhood finger painting to macaroni necklaces to stepping into the mixed-media arena a few years ago with a little bit of everything in between.
Even though I have been in the space for a little over a year now it is still very much a work in progress. It has come a long way from the Project Run Away and Creamy Dreamy beginnings! I have totally recovered from my angst at being tossed into a new space.
I never in a million years thought I would say this, but I did not have enough "stuff" to fill it up! Seriously, I think this gives me permission for a little flea market therapy don't you? I spent a lot of time reading that fortune cookie message at the top of this post while trying to accomplish this studio space on a less than shoe string budget, a lot of hands on hard work, and maintaining the course. Today really is a celebration, I have obtained my goal of a sentimental feminine fusion of fun and function where I can, to quote Nina Bagley, "Walk the earth, stepping beauty into everything you (I) do."
Welcome to the creative space at Quill Cottage...
(Click on any photo to enlarge for better viewing)
 (Collage I learned to make from Lisa in a Mary Green online class)
Here is the view from the hall...
 And here is the full view from the doorway. I converted an old iron crib into a settee. It is dressed in flea market find pillows and I made the other bedding from old pieces of cottons and laces. I have basket storage underneath and a step stool because I am vertically challenged...
 Each side of the settee is flanked by a coffee filter topiary. I made these from two old lamps, two round garden vine frames, a couple of old planters, and coffee filters...
 Behind each planter is an old porch pillar that a friend gave me after a remodel. Each sports a door knob hanger with a collection of empty frames and interesting tidbits...
 Baby, who threw a complete hissy fit last year because she could not attend Karen's party, is quite content to be the keeper of my quote journal and cuddle up in the corner of the settee...

 I married a small garden trellis with a piece of weld wire to make a storage canopy over the settee. See those empty baskets? Those need some stuff in them! I told you I did not have enough stuff in there...
 I keep bits and pieces of collage materials in the vintage hat boxes...
 To the right of the settee is a little nook of a wall next to the main work space...
 I don't know if you noticed it or not but there is a black divided tray on the work surface. This is one of my little collection obsessions, small pieces of nature that bring me so much inspiration and find their way into my work. I have been collecting these little specimens for quite some time with a special project in mind...

 Back to the little nook of a wall...This is a drawer from an old trunk married with an old clock. It makes my husband nuts that the clock has no hands and is upside down. I told him that time has no meaning nor makes no sense when one is creating, it literally ceases to exist when one is immersed in the realms of creative activity...
 Below is a little shabby holder filled with various ribbons and laces. A piece of my fabric artwork, "Cottage Beale" (the name of the girl in the photo) hangs here too...
 (Fabric collage technique I learned from a KC Willis DVD series)
Up above is another piece of my artwork, one of a series of five handmade shoes and boxes, a single ballet slipper...

 A collection of hands...

 And beside that one of my favorite pieces I have ever made, "Dream"...
 To the left of the settee is a small dresser that my daughter in law gave me, I added a couple of porch posts from our remodel and a couple of shelves, this is where I stash all my ribbons, well almost all...
 Here I am, forever encapsulated behind a sheet of glass at age 11 3/4, it felt like magic to sit before a real artist for this portrait...
 Where are my Southern manners? Would you care for a cup of tea while we continue the tour?
 Below sits a few pretties...
 The bust below is wearing an old paste jewel necklace that belonged to my paternal grandmother...
 The lampshade is dressed in a wee crinoline...
 That billowed out the skirt of one of my dresses at age 2...
 My one and only attempt at art doll making, Miss Clara Scarlett...
 A tray full of artistic treats...
 The wee bonnet on the post above the lamp was also mine...
 The bottom two drawers hold trims, tassels, and scraps of ribbons and laces...
 The top drawer is filled with larger lengths of laces and ribbons...
 To the left as you enter the door is the supply closet wall...
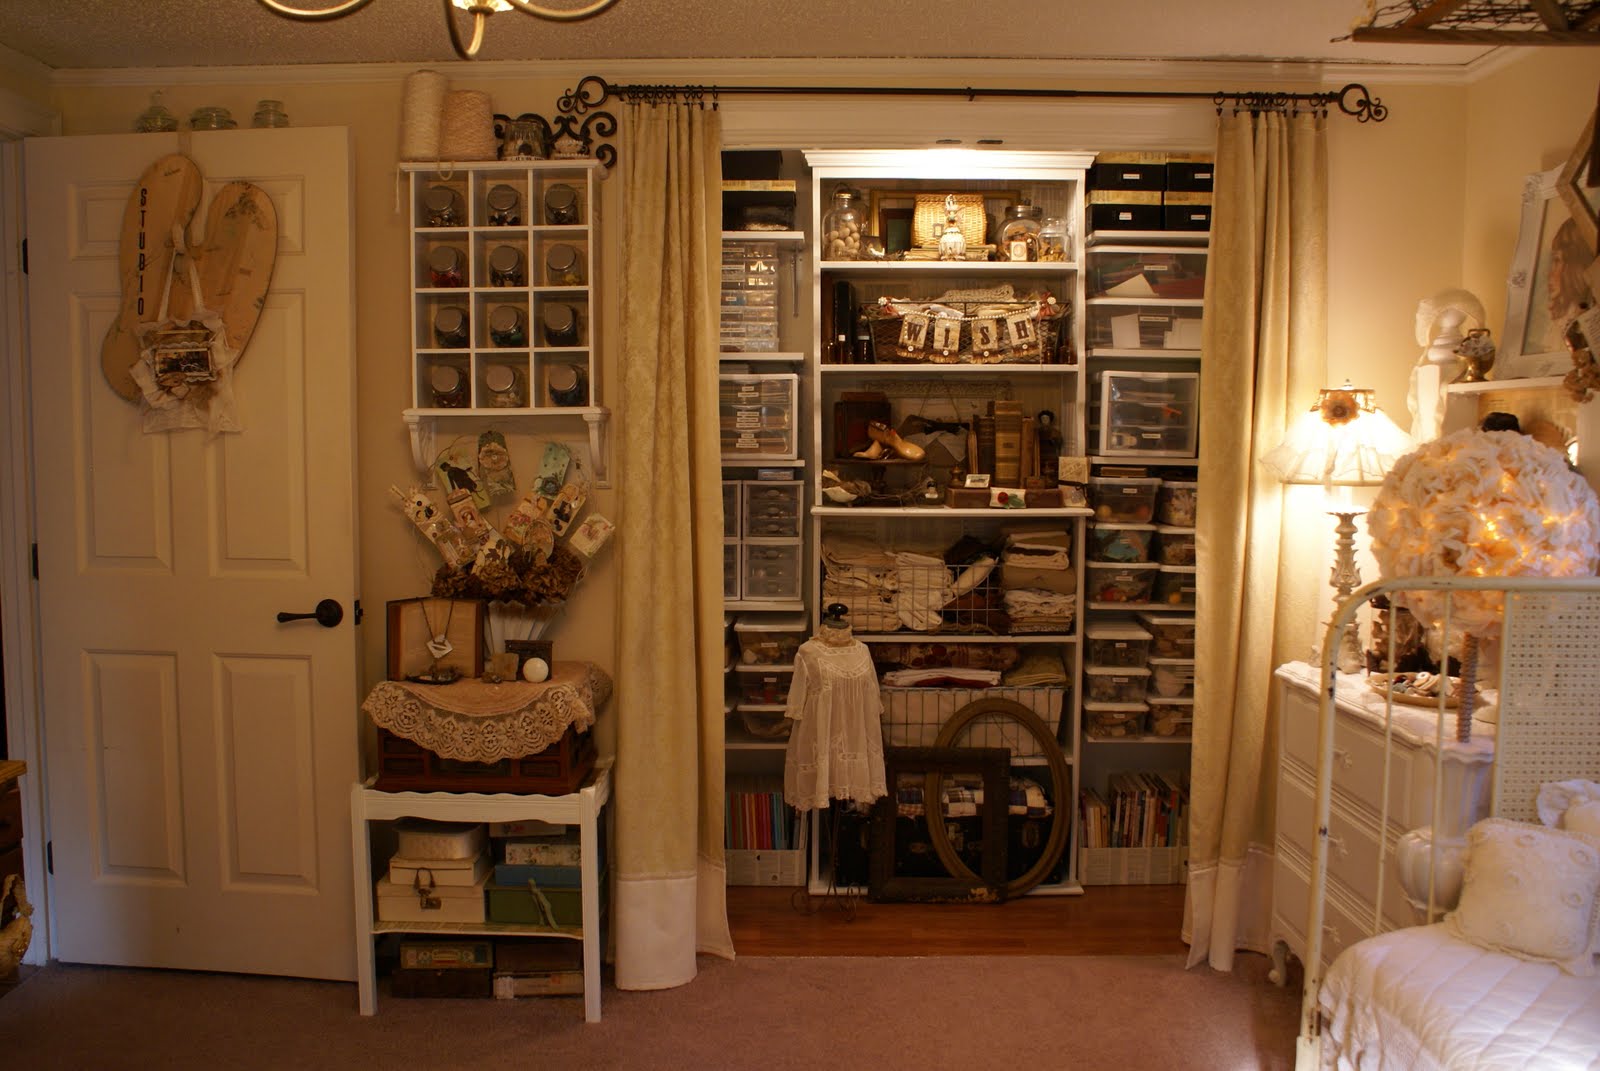 A tiny table, beautiful boxes (all empty! I need more stuff!), and a button cubby with buttons sorted by color in little jars...
 Behind the door, still more storage (more empty little boxes), the shelving were two wooden crates that I sliced down and put backs covered in old book pages, perfect size for small storage items...
 The closet is full of supplies in various labeled containers...
 Inez, is keeping watch over all those fabric scraps...


 Not everything in here is practical, there is a little bit of pretty too...
 To the right of the door is my sewing station...
 It sits beside a dividing piece of furniture that I designed and Handy Hubby helped me build out of scraps and salvage pieces...
 This is one of my favorite new additions, the candle spools. These are frequently used threads in my work and this makes them so handy to just grab when I need them...
 These are super simple to make!
You will need:
*Candle holders of your choice
*Corks that fit the size of your candle holder
*Bamboo Skewers
*Black craft paint
*Wire cutter
*Spools of thread
Instructions:
Place cork in candle holder, you want to make sure there is a tight fit, if not add a little hot glue to secure.
Insert the pointed end of a bamboo skewer into the cork and place your thread spools onto the skewer.
Determine how many spools you want on each holder and trim skewer with a wire cutter leaving a small tip at the top to extend out of the top thread spool to resemble a wick.
Once trimmed to desired size, remove spools, using a little black craft paint, paint the top inch of the skewer to look like a burnt wick.
Once dry replace the spools and enjoy a handy and stylish thread holder!
Now, back to the tour! A banner I made hangs above the outer window area...
 (Banner from Beth and Karla's Romantic Gothic Ghosts online class)
I love this little black bird peeking through the glass...
 A wire basket of sewing keepsakes...
 (Button gifts from Vee and old wooden lace bobbins from Lili)
Above the sewing machine in baskets I store colored spools of thread, embroidery and needlework supplies, as well as sewing machine accessories and such. My gathering basket with dried flowers from my grandmothers garden rest there too..
 See those little black boxes? The bottom one is the prefect size for storing patterns and the top one...
 Holds more spools of candy colored ribbons...
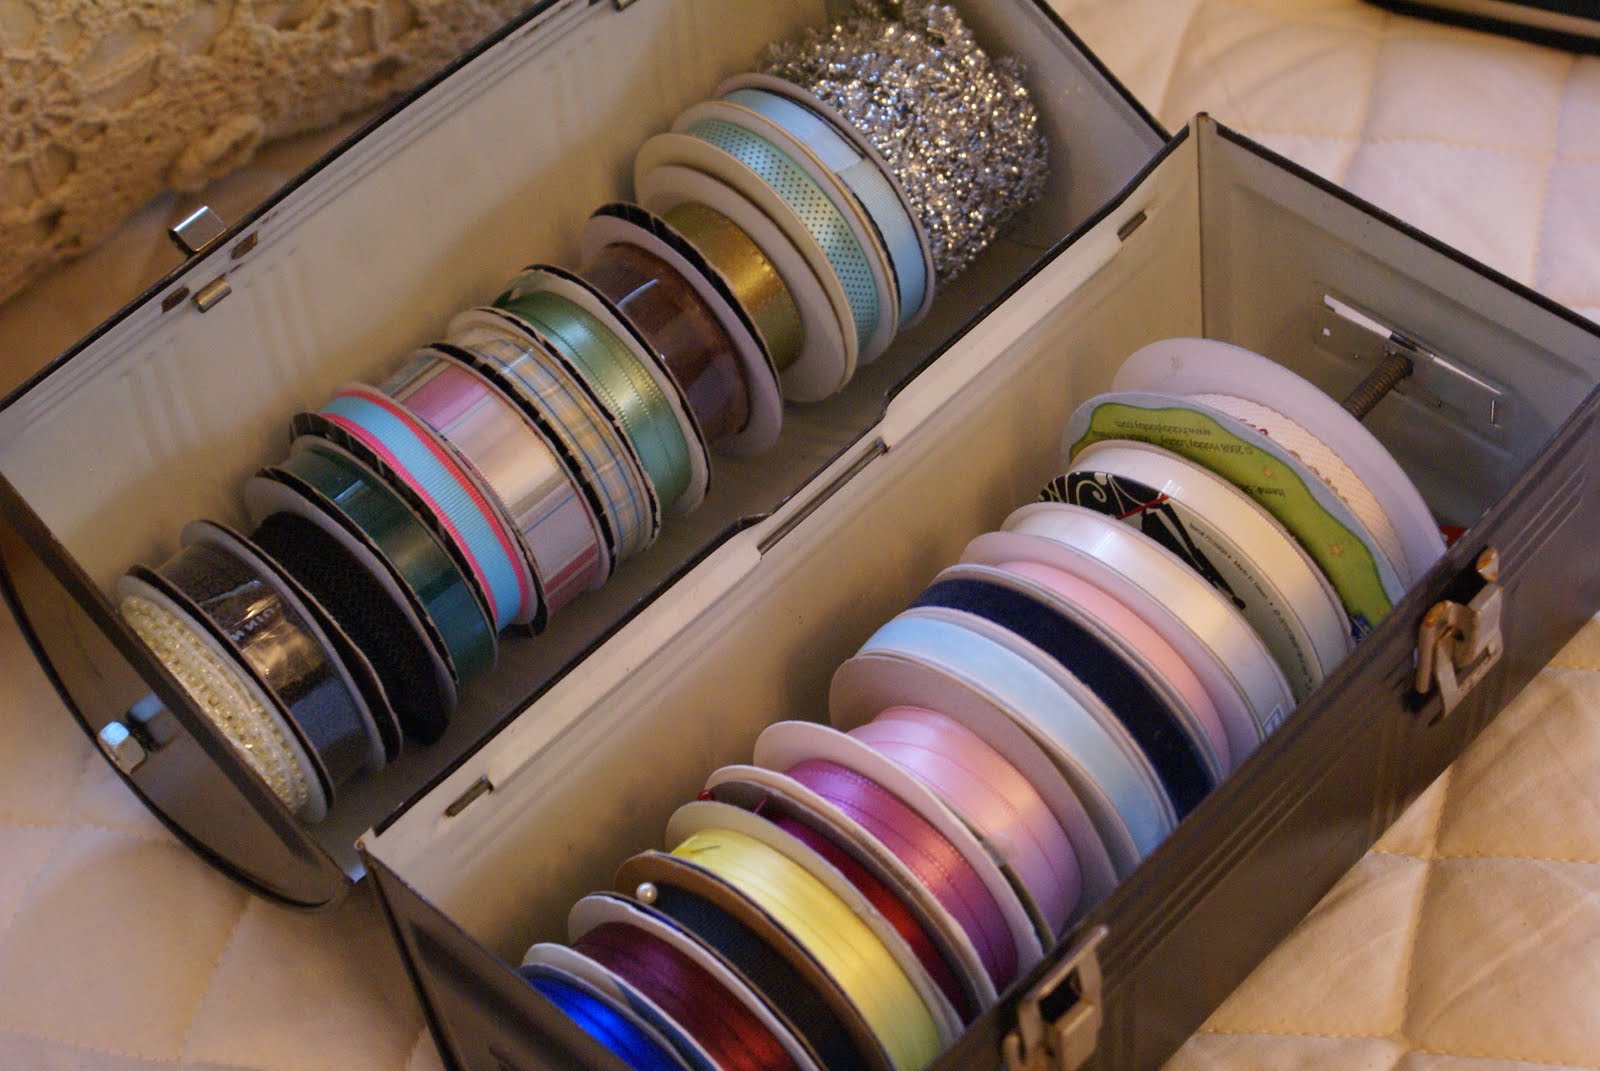 TUTORIAL:
To make this small ribbon spool holder you use a piece of all thread rod, purchased at the hardware store, drill holes the size of the all thread rod, cut rod to extend a little longer that the width of the box top and bottom, secure one end with a hex nut, also purchased at the hardware store, thread through one hole and place spools onto rod, thread rod through other end and secure with second nut. Repeat process with the second rod.
Don't let the piece below fool you it is not nor never was an antique sewing machine! I bought the base with a board top at a flea market and covered the top with old pattern pieces. I found the sewing drawers at an antiques shop and screwed them underneath. I found the sewing machine cover at a vintage linen shop here in town and altered it a bit with some trim for added height and old pattern papers to cover up some damage to the ends of the wood (Sewing Table Tutorial)...
 Lift that baby off and you have a high tech sister to the old treadle machine...
 I love my light, a flea market find, with flower petal globes I found on Ebay. I made the collage medallion from an old picture frame...
 This is a side view of the divider...
 The old revamped child's trunk holds wallpaper and my looms and a few yarns...
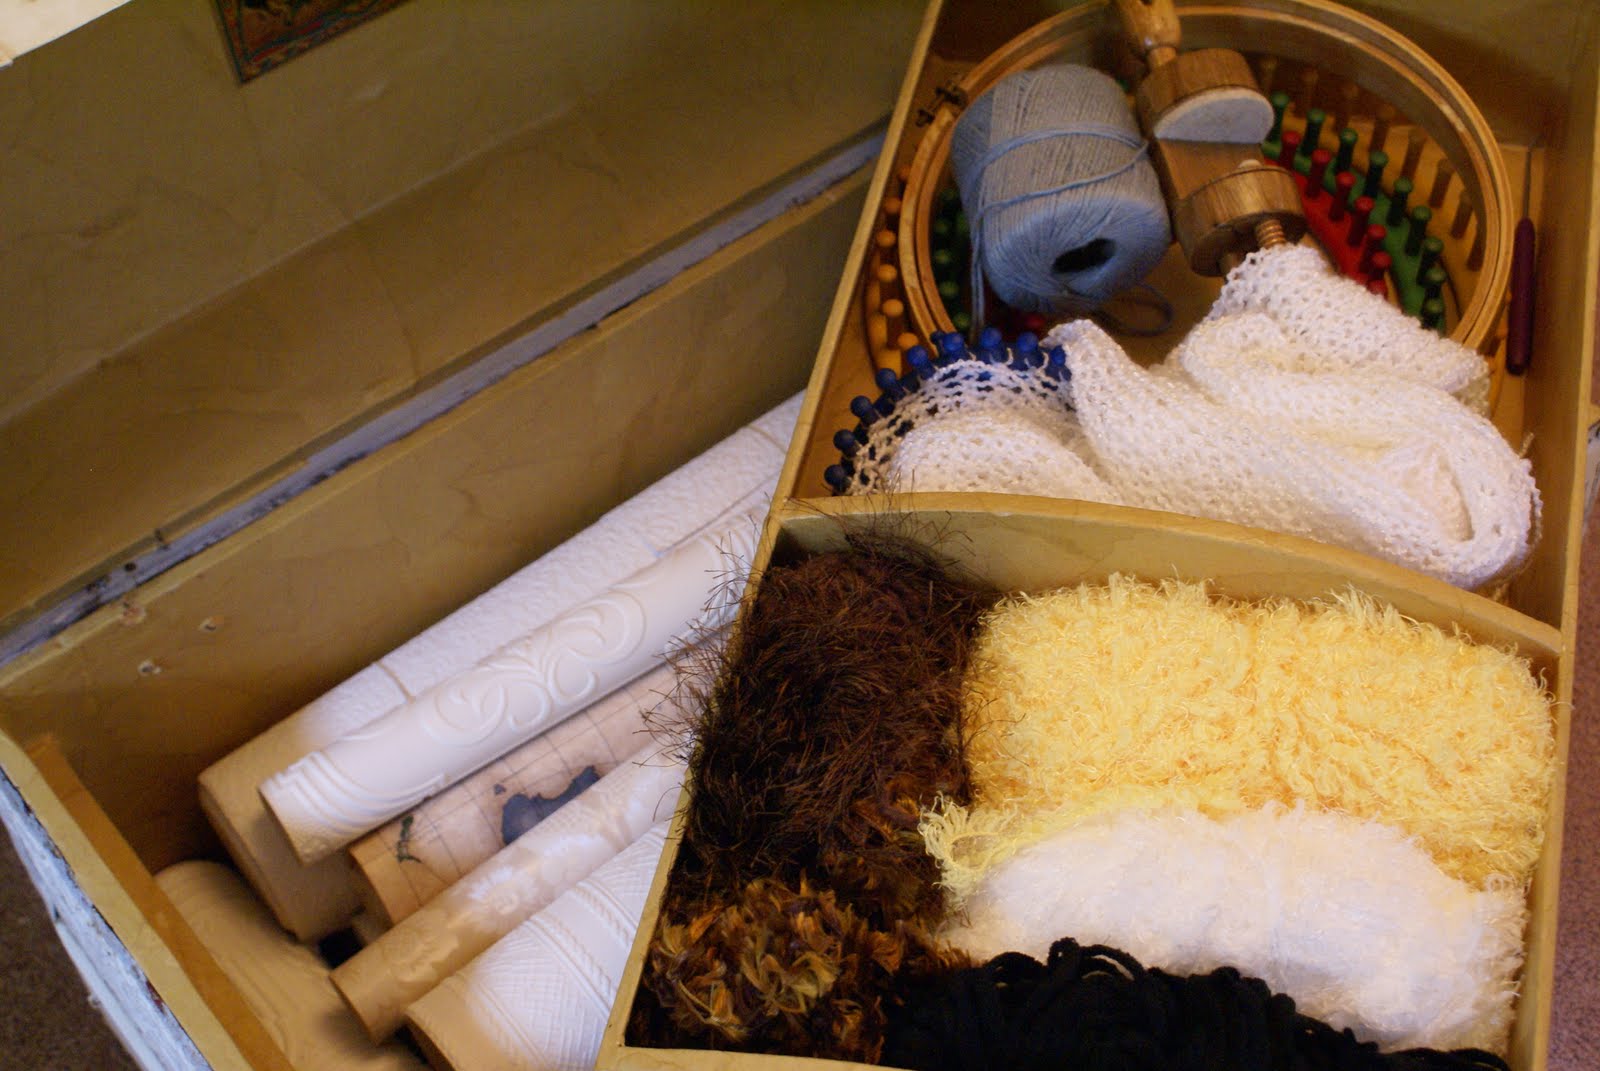 An old garden rake I found at the farm holds artwork from a few fellow artists and a pair of irresistible I had to buy them for old time memories sake roller skates...
 (Lace Ditty Bag, altered domino and tag by Beth, Fabric pocket by Diane, and sweet tags filled with the most delicious trims by Sonya)
This is my little work cube...
 Here is where the hi tech action happens...
 A pair of hand sculpted birds I made a few years ago...
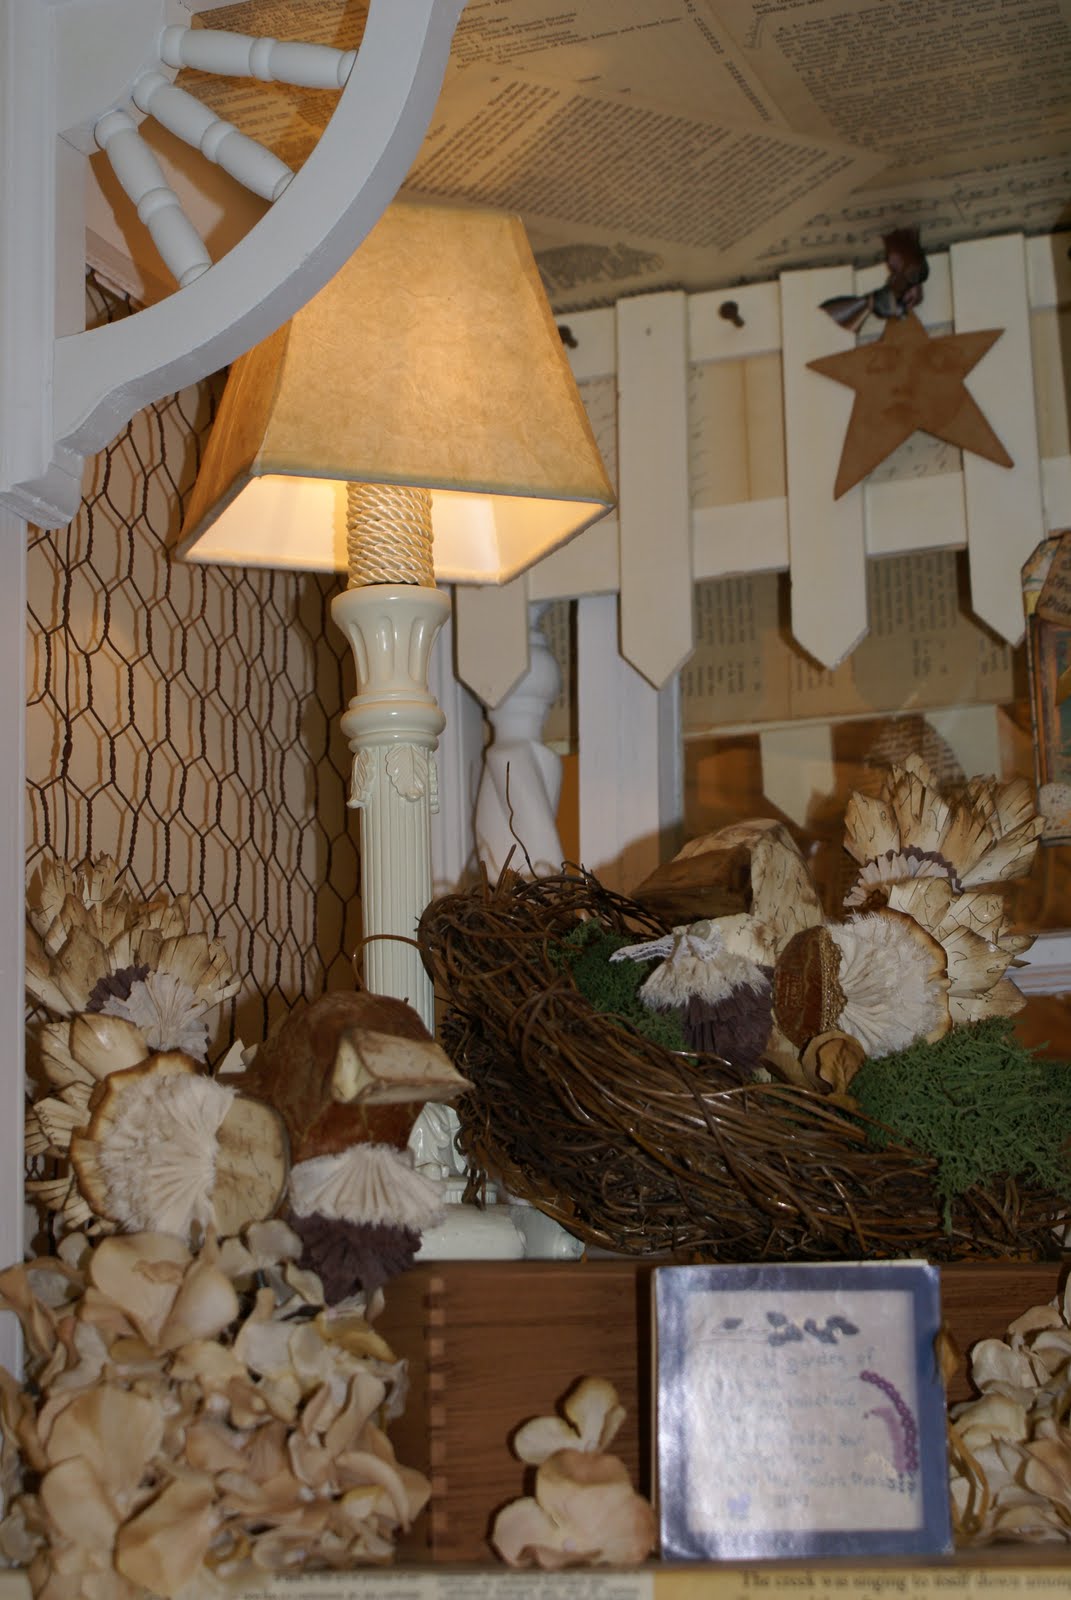 A shelf full of pretties...
 The little jewelry box is one I converted into an ink pad storage cupboard, the tiny drawers hold mini alphabet stamps...
 This little boot and box is another from my handmade shoe series...
 Down below the drape of vintage table cloth lace is more hidden storage, lots of vintage ephemera...
 Here is the other side of my work station...
 I adore this long counter, I can spread a mess alllllll the way across it, and I do too!
 My window treatments are handmade of collage style vintage and new fabrics and laces. I added some fun tidbits above on the window trim, things that make me smile...
 This is a favorite new addition, a ribbon roll holder "lamp"...
 This was one of those times when I let the idea fly, and I love the result, pretty and practical...
 My paternal grandmothers necklaces grace the shade and an old bottle serves as a finial...
 This is a full view of the back wall...
 In the work cubby I used the left over side of the iron baby bed, some old garden fencing, and a shelf turned up side down to make and inspiration rail...
 Lots of pretties on here, you might even see something that you made...

 (Tag book by Diane)
 (Swap box from Lili)
This is the business side of it all, paints, glues, glitter, beads, and tools...
 I adore how handy my glue brushes are...
 Up above more supplies and special items, my children's baby shoes and painting by my daughter...'
 A sweet flea market find...
 If you look carefully you will see three more tiny shoes and boxes in my series...
 The other end of the counter also has a work area for a friend to join me. Want to come and play? Actually the space is designed in such a way that I can easily remove the settee and set up 2 more 4 foot work stations and another in front of the closet area, remove the sewing machine from its station and can easily host 5 to 6 friends..
 More goodies...
 The final shoe and box in my series...
 These little "shelves" were old sewing machine drawer frames, I cut foam core and covered it with a map paper to make shelves to hold smalls. (and I need more stuff to put on them!)...
 A pink mermaid playing with pearls...
 A bitty ballerina swinging above the work station...
 This is where all my instant ancestors live, kind of crowded in there...
 A left over piece of wire from the trellis canopy...
 A pocket book full of wishes...
 Battered books to collage from...
 My version of a sewing bird...
 It seems we have run out of time...
 I have shown you most of what there is to be seen of my work in progress. Remember that studios don't happen over night.
In my case it has taken years to get to this full space. I started out on a TV tray, moved to a card table with all my supplies stored under the bed in plastic bins. I thought I hit the big time when I got a cupboard for supplies and commandeered the dining table but my family had to eat off of the TV trays!
I then moved to a storage building in our yard but in the winter my paints and glues froze and in the summer everything threatened to melt into a puddle despite the little heater air conditioner chugging away. I was secluded from family life and having young children at the time I could not spend much creative time there without keeping a watchful eye on them so my creativity went fallow for a few years.
In the blink of an eye my children were suddenly grown, my son married and made a home of his own with his bride and I found myself left with a spare room which I turned into a guest room that was rarely ever used. One day I sat in that beautifully appoint yet seldom used room and allowed myself to dream again of a creative space. I approached Handy Hubby with my crazy idea of forgetting about guests and building a small dream space to revive my creativity and he agreed. My Mid-summers blue studio was born.
Fast forward a few years, my daughter moved out on her own and we had another vacant room, Handy Hubby expressed his desire to have a real office so I was tossed out of my little blue studio into the space that you are viewing now. This dream was literally years in the making but lack of space, lack of storage, even lack of time never dampened the dream of a creative haven to make and share art in. I wholly encourage you to give yourself time and room to grow and watch your own dream bloom into being.
I hope you have enjoyed the tour and gathered an idea or two. I look forward to a return visit to you!
I hope each and every one of you enjoy a delight filled weekend!

